The Big Picture: Two Directions
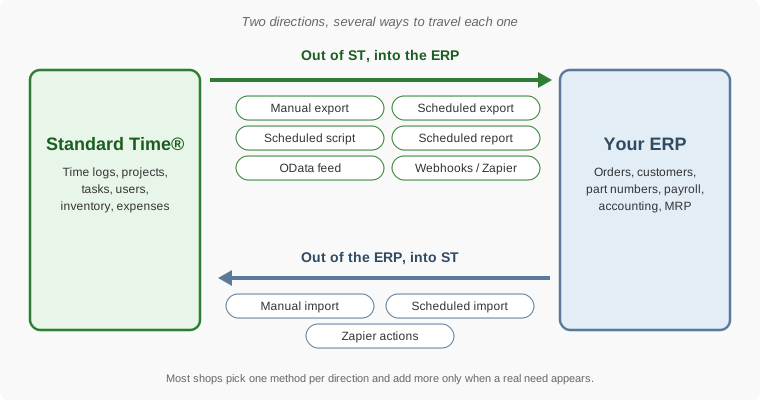
Every connection to an ERP is one of two moves:
- ST → ERP Labor hours, job progress, material use and expenses recorded on the shop floor go to the ERP so it can cost jobs, run payroll or invoice.
- ERP → ST Customers, job numbers, part numbers and employees that already live in the ERP are loaded into Standard Time® so nobody types them twice.
Standard Time® offers nine ways to do this. They differ in just two things: who starts it (you, a schedule, the other system, or an event) and how the data travels (a file, an email, a database, or a live connection).
| Method | ST → ERP | ERP → ST | Who starts it |
|---|---|---|---|
| Manual export | Yes | — | A person |
| Manual import | — | Yes | A person |
| Scheduled export | Yes | — | A schedule |
| Scheduled import | — | Yes | A schedule |
| Scheduled script | Yes (results) | — | A schedule |
| Scheduled report | Yes (reports) | — | A schedule |
| OData | Yes (read only) | — | The ERP or reporting tool |
| Webhooks | Yes (events) | — | An event in ST |
| Zapier | Yes | Yes | An event in either system |
ST → ERP Manual Export
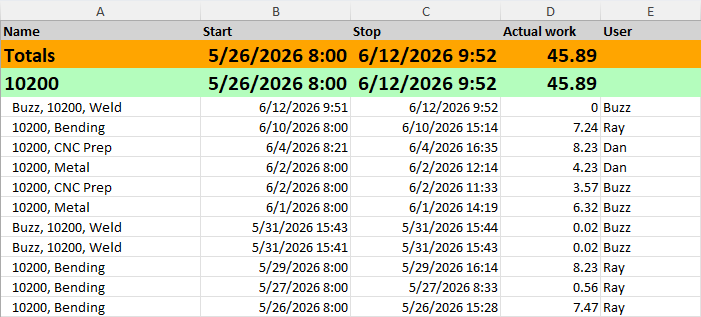
The simplest way to hand data to an ERP: open the page you want (Time Logs, Projects, Expenses, Inventory and so on), narrow it down with the Filter panel, and send what you see to a file. Nothing to configure, nothing to schedule, and you can check the result before it goes anywhere.
- Open the page, for example Time Logs, and filter it to the records the ERP needs (such as last month).
- Choose File › Export.
- Pick the format from the list, and save or open the file.
- Load that file with the ERP's own import tool.
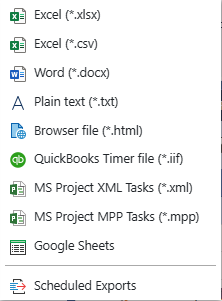
- Excel (.xlsx) and CSV (.csv) are the best choices for an ERP. Nearly every ERP can read them.
- Google Sheets sends the data straight to a spreadsheet; see the Google Sheets guide.
- QuickBooks Timer (.iif) is for QuickBooks users; QuickBooks Online has a direct integration.
- MS Project (.xml and .mpp) carries project tasks to and from Microsoft® Project®.
- What you export is what the grid shows: hide a column and it is left out, filter rows and they are left out.
Best for: month-end handoffs, one-off jobs, trying out a file layout before you automate it.
ERP → ST Manual Import
Export a list from the ERP (customers, part numbers, open jobs, employees) as a spreadsheet or CSV file, then load it into Standard Time® from the matching page. Each page's import takes the kind of record it is named for.
- Export the list from your ERP as .csv or .xlsx. Make the first row a header row whose column names match the Standard Time® field names.
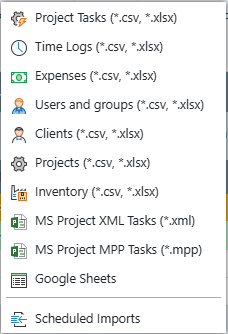
- In Standard Time®, choose File › Import and pick the kind of record: Project Tasks, Time Logs, Expenses, Users and groups, Clients, Projects, or Inventory.
- Choose your file. Standard Time® reads it and reports how many records were added or updated.
- To find the exact column headings, open the page (for example Projects), click any existing record, and read the field labels in the Properties panel. An exported file's headings do not always match what import expects, so build the import file from those labels.
- Google Sheets and MS Project (.xml and .mpp) are also on the Import menu.
- Test with a small file first, then load the full list.
Best for: the first big load of customers and part numbers, periodic refreshes, one-off corrections.
ST → ERP Scheduled Export
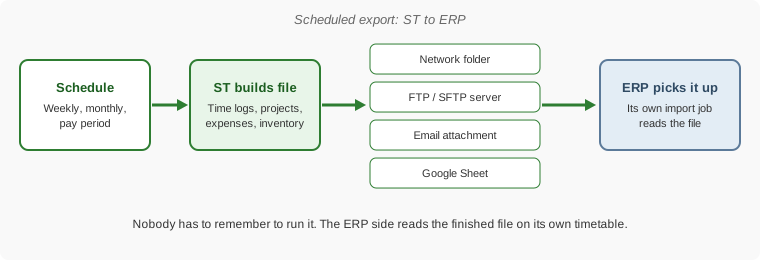
A scheduled export is a manual export that runs by itself. You choose the data, the file format, where the file goes, and when to run it (weekly, monthly, yearly, or at the start of each pay period). The ERP then reads the finished file on its own timetable.
- Choose File › Export › Scheduled Exports.
- Click New and fill in the Properties panel: a name, the data to export, the file name and format, and the schedule.
- Choose where it goes: a folder the ERP watches, an FTP or SFTP server, an email address, or a Google Sheet.
- Right-click the row and choose Run export now to test it before the first scheduled run.


- Date tags such as last week keep the data range current without editing the export each time.
- Add date to export name keeps an archive instead of overwriting the previous file.
- Sequences let several exports run one after another.
- A folder path points to the server's export folder in the web edition; the Windows edition can write to any folder on your network.
Best for: a nightly or weekly labor feed for the ERP, payroll files at each pay period, regular archive copies. Full details are in Advanced: Scheduled Exports.
ERP → ST Scheduled Import
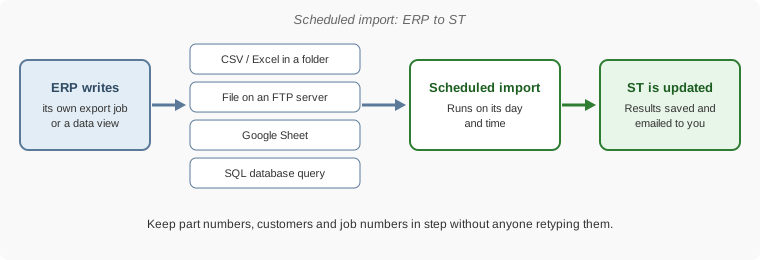
A scheduled import is a manual import that runs by itself. Standard Time® reads a file the ERP leaves behind, or queries a database the ERP fills, and updates its own records on a day and time you choose. Customers, job numbers and part numbers stay in step with the ERP without anyone retyping them.
Where the data comes from:
- A file in a folder: a CSV or Excel file the ERP exports to a known path.
- A file on an FTP server: Standard Time® downloads it using an FTP connection, imports it, and cleans up the temporary copy.
- A Google Sheet: useful when someone maintains the list in a spreadsheet.
- A SQL database: a connection and a query against a database the ERP keeps current.
- Choose File › Import › Scheduled Imports and click New.
- Choose the kind of record to import (for example Clients, Projects or Inventory) and where the data comes from.
- Set the schedule, and an email address if you want a results message after each run.
- Run it once manually and check the result before leaving it on its own.
- Each run saves its last results (how many records were updated, or what went wrong) in the record and can email them to you.
- If the file is missing or the FTP download fails, the run stops with a clear message instead of changing anything.
- Scheduled imports are included with the Enterprise plan; see Pricing.
Best for: a nightly refresh of customers and part numbers, bringing new ERP job numbers into Standard Time® every morning.
ST → ERP Scheduled Scripts
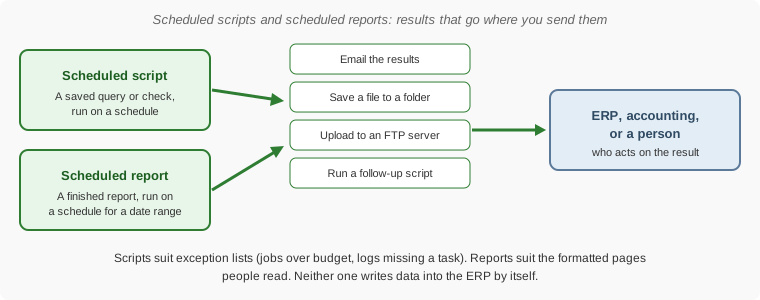
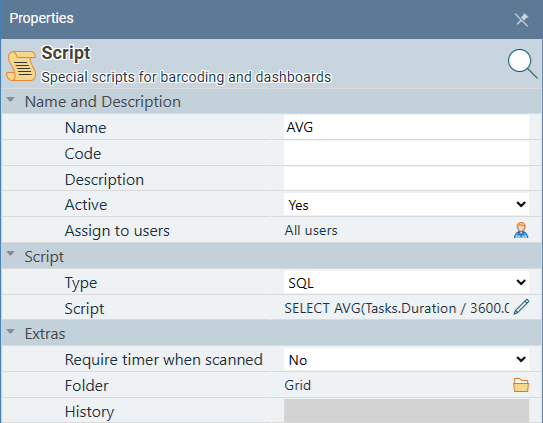
A script is a saved query or check that answers a specific question about your data, such as which jobs are over budget or which time logs have no task. A scheduled script runs that question on a recurring schedule and sends you the answer. It is the right tool when the ERP (or a person on the ERP side) needs a focused list rather than every record.
- Schedule: the same options as other scheduled items, including pay-period starts.
- Send results: by email (the script name becomes the subject, with the date and time), optionally only when there are results, so a quiet day sends nothing.
- Save results: to a file, optionally only when there are results, and optionally upload it to an FTP server.
- Follow-up script: a second script can run after the first one finishes.
Best for: exception feeds that the ERP team reviews each morning, and checks that catch problems before they reach payroll or invoicing. To learn how to write one, see Create a Scannable Script and Script Columns in Grids.
ST → ERP Scheduled Reports
A scheduled report runs one of Standard Time®'s reports on a schedule and delivers the finished page, not raw rows. It suits the people on the ERP side who need a readable summary (hours by job, labor by employee, material use) rather than a data file.

- Pick the report (including custom reports saved in the database) and choose a date range or filter.
- Pick the output format and the destination: email, a saved file, or an FTP upload.
- Schedule it daily, weekly, monthly, or at the start of each pay period.
- Chain a follow-up script to run after the report finishes.
Best for: weekly job-cost summaries for the controller, pay-period labor summaries for payroll. To learn about the reports themselves, see How to Run Time Reports.
Live Connections: OData, Webhooks and Zapier
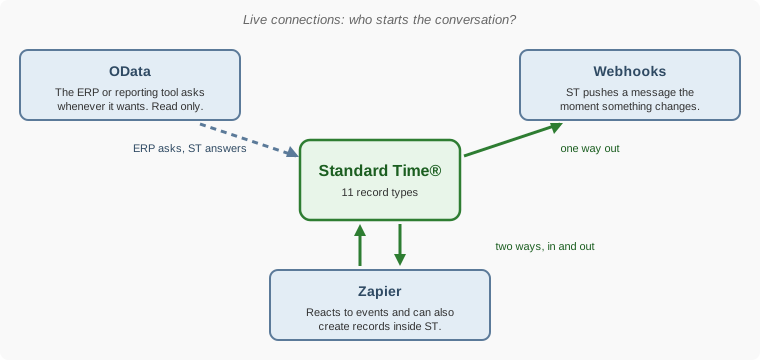
The methods above move data in batches. The next three are live: they connect the systems directly. The difference between them is who starts the conversation.
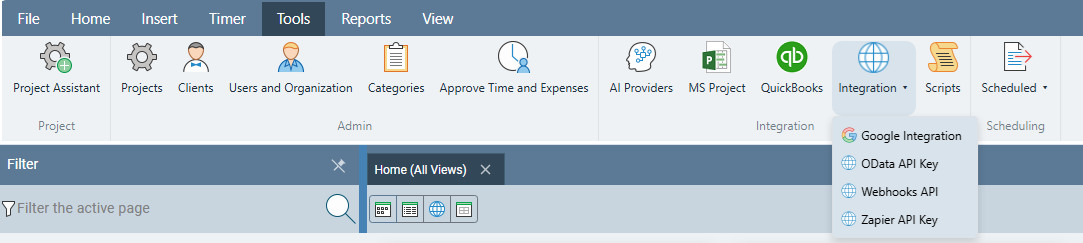
All three are set up from the Tools ribbon, in the Integration dropdown.
ST → ERP OData
OData is a standard, read-only way for another system to ask Standard Time® for data whenever it wants it. You generate an API key, give the key and your account address to the ERP or reporting tool, and it can read time logs, projects, tasks, users, clients, inventory and more, with filters, sorting and paging. Nothing is copied to a file first, so what the other system sees is always current.
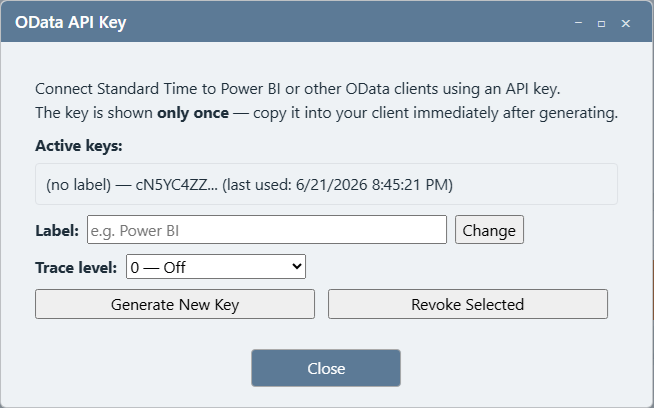
- Read only: OData can fetch data but cannot create or change anything in Standard Time®.
- You can revoke the key at any time to cut off access.
- Many ERPs and data tools can consume OData directly; Power BI is the most common example.
Best for: live dashboards, ERPs or data warehouses that can pull from an OData address on their own schedule. Start with the OData & Power BI integration guide and the schema reference.
ST → ERP Webhooks
A webhook is a message Standard Time® sends to an address you choose the moment something happens: a project is created, a time log is updated, an expense is deleted. The ERP (or a small service in front of it) receives the message and acts on it right away. Each message is signed so the receiver can confirm it genuinely came from your Standard Time® account.
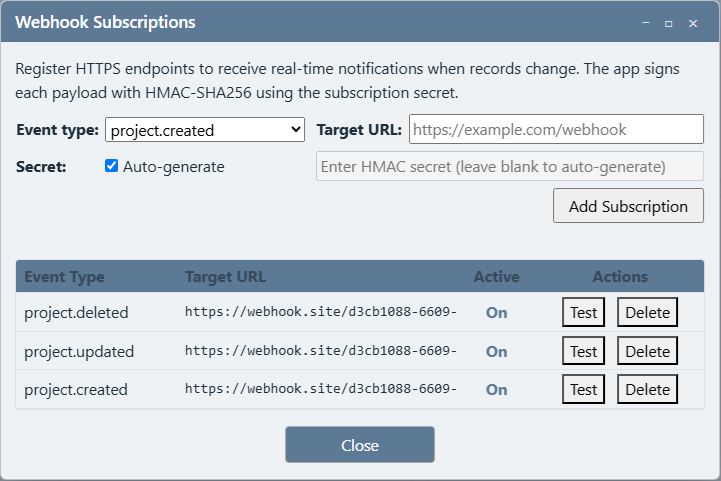
- Events: created, updated and deleted, for each of eleven record types.
- One way: webhooks only send. They cannot add or change records in Standard Time®.
- The receiving system needs an address that accepts incoming messages. Many ERPs and automation tools can provide one.
Best for: near-instant updates, such as telling the ERP the moment a job's last task is finished. See the Webhooks guide and the step-by-step webhook test.
ST → ERPERP → ST Zapier
Zapier connects Standard Time® to thousands of other apps without programming. A "Zap" starts with a trigger (something happens in one app) and performs an action (something is done in another). If your ERP or its surrounding tools have a Zapier connection, you can move data both ways: an ERP event can create a project or time log in Standard Time®, and a Standard Time® event can create or update a record in the ERP.
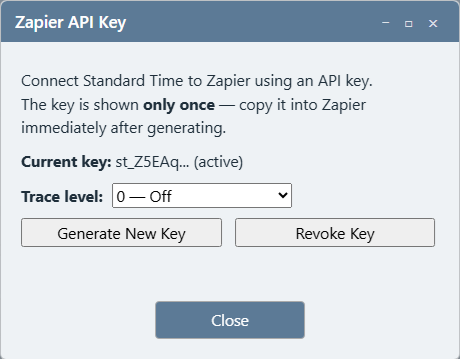
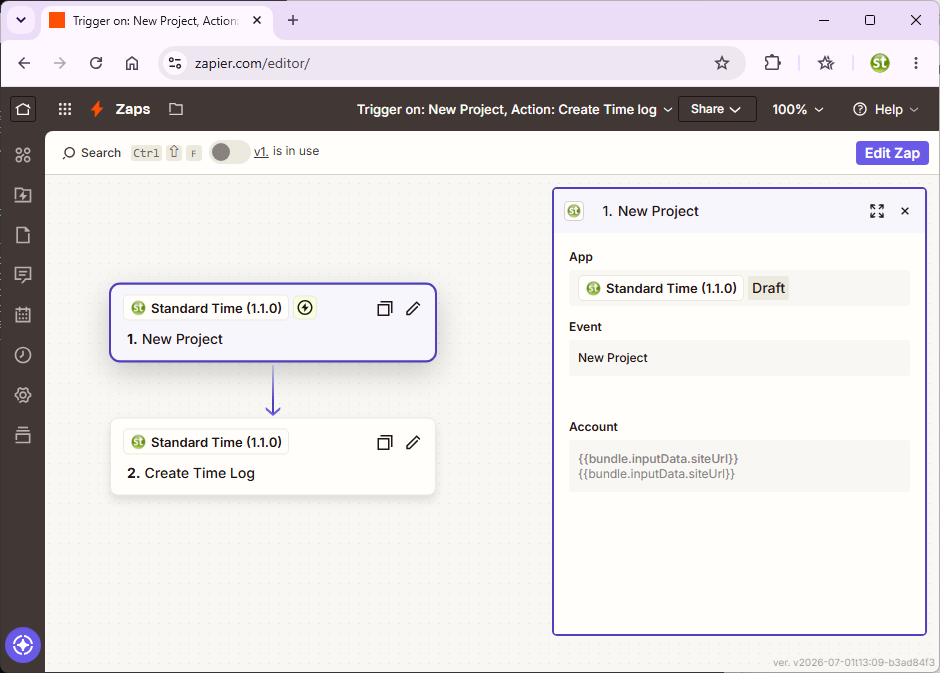
- Two ways: Zapier is the only live connection that can also write records into Standard Time®.
- No code: mapping fields between the two apps is done by pointing and clicking.
- Zapier is a separate service with its own plans and task limits.
Best for: shops without IT staff who want to automate ERP handoffs in either direction. See the Zapier guide and the Zapier end-to-end test.
Which One Should I Use?
Start with how quickly the other system needs the data, then with who can do the work on the ERP side.
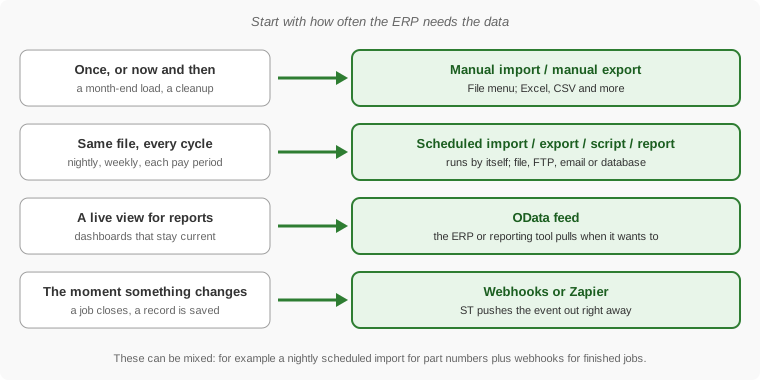
| I want to… | Use |
|---|---|
| Hand last month's labor to the ERP once | Manual export |
| Load the ERP's customer or part list for the first time | Manual import |
| Give the ERP a labor file every night or every pay period | Scheduled export |
| Keep customers, job numbers and parts in step with the ERP automatically | Scheduled import |
| Send the ERP team a daily exceptions list | Scheduled script |
| Send the controller a weekly job-cost page | Scheduled report |
| Let the ERP or a dashboard read current data whenever it likes | OData |
| Tell the ERP the instant a record changes | Webhooks |
| Automate both directions with no programming | Zapier |
Three Example Setups
Most shops combine two or three of these. Here are common patterns.
1. The Spreadsheet-Based Shop
- ERP → ST: a scheduled import reads the customer and job list the ERP exports to a folder each night.
- ST → ERP: a scheduled export drops a labor CSV in a folder at the start of each pay period; the ERP's import picks it up.
2. The Shop With an IT Person
- ERP → ST: a scheduled import runs a query against a database the ERP keeps current.
- ST → ERP: the ERP reads Standard Time® data through OData, and a webhook tells it the moment a job is finished.
3. The Shop With No IT
- Both directions: Zapier moves new ERP jobs into Standard Time® and sends finished labor back.
- Safety net: a scheduled report emails the controller a weekly summary to compare against the ERP.
What to Know Before You Start
- The other end is yours to set up. Standard Time® produces and reads files, queries, messages and OData, but it does not include ready-made connectors for any one ERP. Your ERP (or its consultant) needs a way to read a file, query data, or receive a message.
- Match your identifiers. Agree on one job number, one customer name and one part number format across both systems before automating. Mismatched names are the most common cause of duplicates.
- Standard Time® is not your accounting system. It does not replace purchase orders, a general ledger or invoicing. It records the labor and material facts that the ERP then costs and bills.
- Test before you trust. Run every scheduled item once by hand and check the results on a small set of records.
- Watch the first week. Scheduled items save their last results and can email them, so turn on the email notification and read it.
- Not sure which to pick? Contact us. We can help you choose and set up the right connection for your ERP.
- Advanced: Scheduled Exports — every property in the Scheduled Exports panel
- FTP Connections — deliver and fetch files by FTP or SFTP
- Google Sheets Import and Export
- Integrations Hub — QuickBooks, OData, Zapier, Webhooks and more
- FAQ: Import and Export