What You Can Automate with Zapier
Zapier connects Standard Time® to thousands of other apps without writing a single line of code. The integration works in both directions:
- Triggers — Zapier watches Standard Time® and kicks off a Zap the instant a record is created or updated: a new project, a finished time log, a logged expense, a new inventory item, and more.
- Actions — Zapier creates or updates records inside Standard Time® in response to something happening in another app: a signed deal in your CRM creates a new Project, a form submission creates a Client, a scheduled trigger logs a recurring expense.

Because Standard Time® can be both the trigger app and the action app in the same Zap, you can even chain steps entirely within your own account — for example, firing a "New Project" trigger that automatically creates a starter Time Log or Task.
Record Types Zapier Can Use
Eleven Standard Time® record types are available to Zapier. Ten support the full set of New/Updated triggers plus Create/Update actions; Users are trigger-only, since accounts are provisioned inside Standard Time® directly.
Work orders and jobs — status, dates, client, rates
Project tasks — dates, assignment, percent complete
Labor entries — user, project, duration, billable flag
Nested project phases with their own rates
Material usage, mileage, out-of-pocket costs
Customers — contacts, addresses, terms
Employees — trigger only, read-only from Zapier
Parts catalog — stock, cost, SKU, reorder rules
Time log / expense categories with rate overrides
Invoice records — amount, terms, paid status
Per-user, per-project rate overrides

Generate Your Zapier API Key
Zapier needs three pieces of information to connect to your Standard Time® account: your Site URL, your Customer ID, and an API Key generated inside the app. The Site URL and Customer ID are the same values you already use to reach your Standard Time® cloud site. Generate the API key as follows.
https://stcloud67.com/?cid=1000. The Site URL is everything up to and including the domain (https://stcloud67.com). The Customer ID is just the value after ?cid= — in this example, 1000. (Real CIDs are usually longer alphanumeric strings; 1000 is shown here only as a placeholder.) If you don't see ?cid= in your address bar, check Help → About inside Standard Time® instead.
-
Open the Tools ribbon → Integration dropdown → Zapier API Key.
In the top ribbon, click the Tools tab. In the Integration panel, click the Integration dropdown and choose Zapier API Key.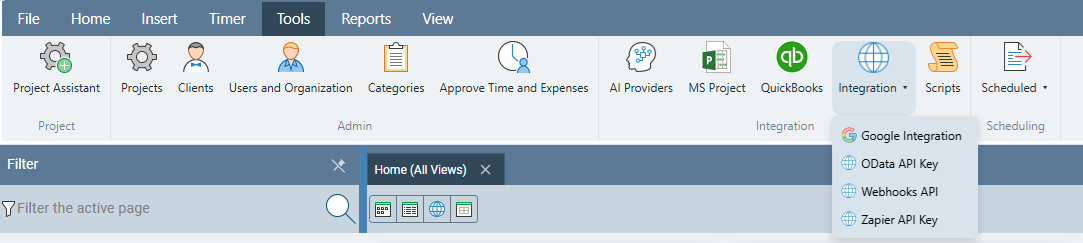
-
Generate a new key and copy it immediately.
The Zapier API Key dialog shows your current key prefix. Click Generate New Key — the full key is shown only once, so copy it right away. You will paste it into Zapier's "Connect Account" screen in the next step. If a key is ever compromised, return here and click Revoke Key, then generate a new one.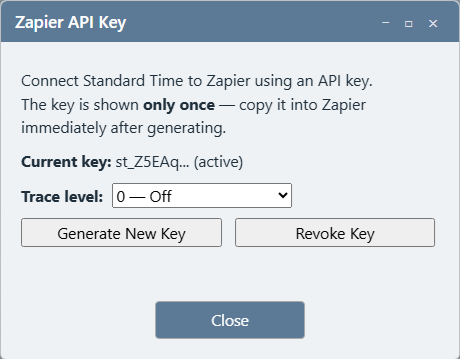
Connect Your Account in Zapier
-
Sign in to Zapier and search for "Standard Time."
At zapier.com, create a Zap and search the app picker for Standard Time as either the trigger or action app. -
Choose "Connect a new account" and fill in the three fields.
Enter your Site URL and Customer ID — split from the URL you use to reach Standard Time® as shown above (e.g.https://stcloud67.com/?cid=1000→ Site URLhttps://stcloud67.com, Customer ID1000) — and the API Key you copied in the previous step. -
Zapier verifies the connection.
Zapier calls Standard Time® to confirm the credentials are valid. Once connected, the account is labeled by your Site URL — helpful if your team ever connects more than one Standard Time® site.
Build Your First Zap
Every Zap starts with one trigger and ends with one or more actions. Here's the general flow for a Zap that starts in Standard Time®:

-
Choose Standard Time® as the trigger app and pick an event.
For example, choose New Time Log to fire whenever a shop floor employee logs time. -
Select your connected account and test the trigger.
Zapier pulls a sample record so you can see what fields are available to map into later steps. -
Add an action step.
Pick any app — Slack, Google Sheets, email, QuickBooks — or choose Standard Time® again if you want the Zap to create or update a record back in your account. -
Map fields, test, and publish.
Map the trigger's output fields into the action's input fields, run a test, and turn the Zap on. Standard Time®'s dynamic dropdowns for Project, Client, Subproject, Category, and Inventory let you pick records by name instead of typing raw IDs.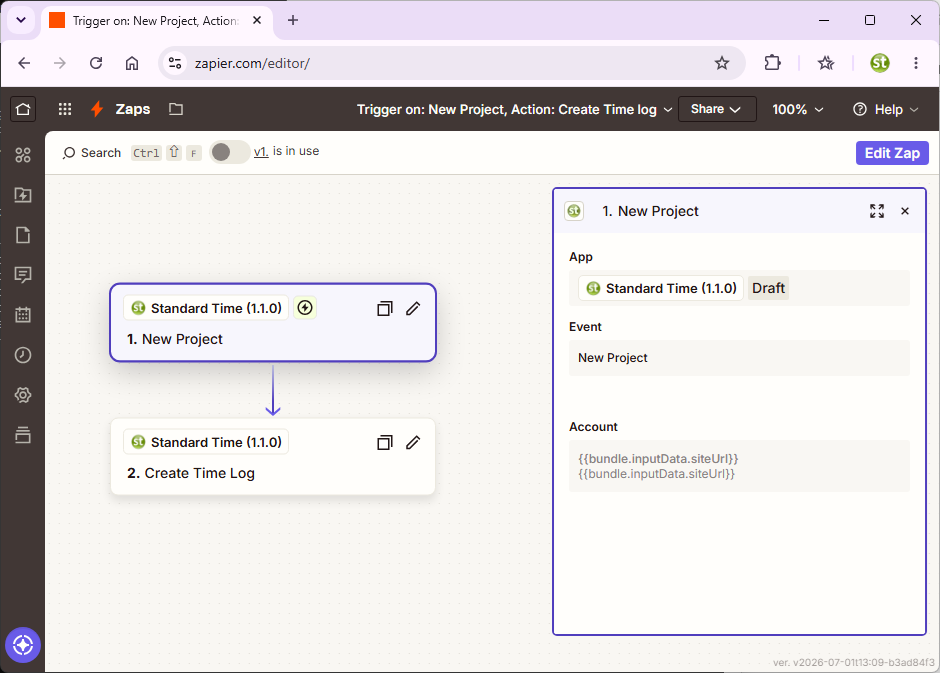
Automation Ideas
A few starting points — every Zap below uses only the trigger/action pairs already covered above.
- New Project in Standard Time® → post an announcement to a Slack channel so the shop floor knows a new job just started.
- New Time Log in Standard Time® → add a row to a Google Sheet for a payroll or client review copy.
- New Expense in Standard Time® (billable) → email the project manager for approval before it reaches the client invoice.
- New row in a Google Form or Typeform lead capture → Create Client in Standard Time® automatically.
- New deal won in a CRM like HubSpot or Salesforce → Create Project in Standard Time® to kick off the job.
- New Invoice in Standard Time® → send a Slack DM or Teams message to accounting.
- Low stock flagged by an Updated Inventory trigger → create a task or send an email to reorder parts.
Beyond Zapier
Zapier is built for event-driven automation — one record change triggers one downstream action. If your goal is different, another Standard Time® integration may fit better:
Smoke-Test Your Zapier Connections — a full step-by-step walkthrough: build a two-step Zap, test each step, and confirm the loop closes back in Standard Time®.
OData & Power BI Integration — pull live Standard Time® data into BI dashboards for reporting instead of one-at-a-time automation.
QuickBooks Online Integration — Google Sheets Integration — All Integrations