DEACTIVATEJOB. If you are searching the help documentation or release notes, search for "deactivate" rather than "archive."
What "Active" Means
Every project in Standard Time® has an Active property — a simple on/off switch that controls whether the project is available on the shop floor. When Active is checked, employees can scan that work order's barcode to start a timer. When Active is unchecked, the project is invisible to the scan station: scanning its name or code does nothing.
Deactivating a project does not delete anything. Every time log, task record, expense, and work order entry stays fully intact and reportable. The project simply stops accepting new scans. You can still:
- Run reports against it — all historical data is included
- View its task list and time logs in the application
- Re-activate it at any time if the job resumes
- Filter by the Inactive folder to find it immediately
The Two-Step Deactivation Process
Closing out a completed project takes two actions: uncheck the Active property to block scanning, then move the project to an Inactive folder to keep your active views clean. Either step alone is useful, but together they give you precise control over what appears in everyday views and what is available to employees on the floor.

- Open Home > Projects.
- Click the completed project row. The Properties panel opens on the right side of the window.
- Uncheck the Active checkbox in the Properties panel.
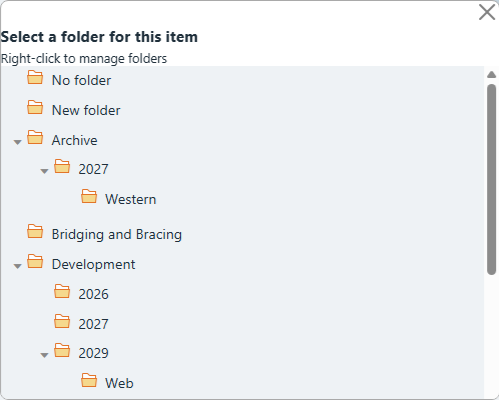
- Scroll to the Folder field and type Inactive (or select it if already created).
The change takes effect immediately — there is no save button. As soon as you uncheck Active, the project is no longer scannable on the shop floor. The folder assignment hides it from filtered views the moment you navigate away from the Inactive folder.
Finding the Active Property
The Active property lives in the Properties panel — the panel that slides open on the right side of the window when you click any project row. It appears near the top of the Properties panel alongside the project name, code, and status fields.
- Open Home > Projects.
- Click any project row. The Properties panel opens on the right.
- Look for the Active checkbox near the top of the Properties panel.
- Uncheck it to deactivate. Check it to reactivate.
Creating an Inactive Folder
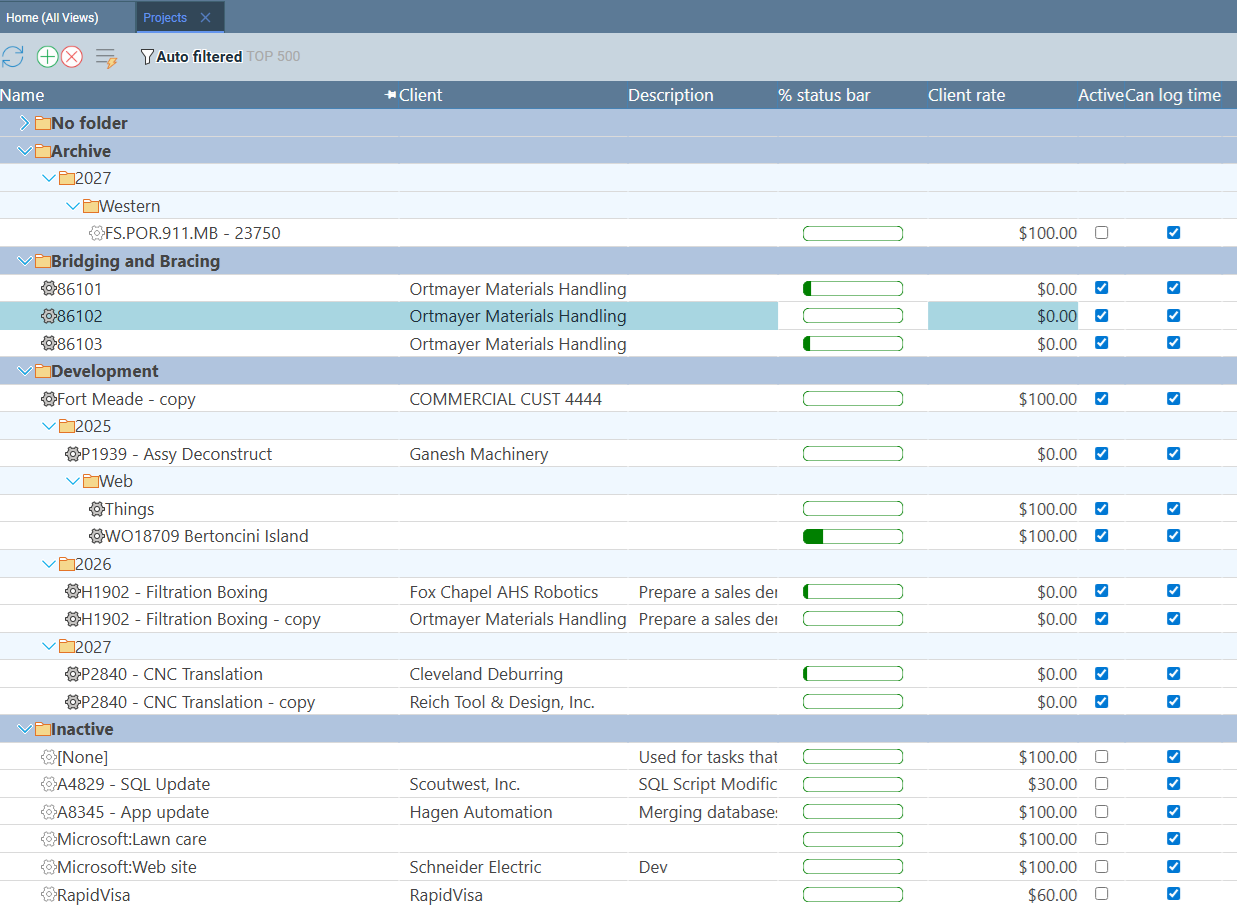
Unchecking Active prevents scanning, but the project still appears in the Projects grid alongside your open work orders. Moving it to an Inactive folder solves that: once the project is in a named folder, you can filter by any active client or job-type folder and the completed job disappears from view entirely.

Type Inactive into the Folder field on any project to create it, or click New Folder in the popup that appears when you click the field. After that, the folder appears in the Filter panel on the left side of the window. Assign it to every completed project and your active views will stay clean automatically.

- Click a completed project row to open the Properties panel.
- Scroll to the Folder field and type Inactive.
- Press Tab or click away — the folder is created immediately.
- Repeat for each completed project. The folder name autocompletes after the first entry.
- To view inactive projects at any time, open the Filter panel and click the Inactive folder.
What Employees See
When a project is inactive, the Scan Barcodes page on the shop floor simply ignores attempts to scan that work order. An employee who scans a deactivated project's barcode will not get a timer started — the scan produces no result for that project.
This happens automatically with no action required from the employee. They do not need to know the project is deactivated. The scan station will not present an error or a prompt — the project scan is just not acted on. Employees continue their normal scan workflow and will only be able to start timers on active projects.
Barcode Scans: DEACTIVATEJOB & ACTIVATEJOB
Managers who work on the shop floor don't have to step away to a computer to deactivate a project. The special barcodes DEACTIVATEJOB and ACTIVATEJOB let you toggle a project's Active property directly from the scan station without opening the Properties panel.

The scan sequence follows the normal shop floor flow: scan your username barcode, then scan the work order barcode to identify the project, then scan DEACTIVATEJOB to mark it inactive. The project is deactivated immediately — employees on other scan stations will no longer be able to start timers on it.
- Scan your username barcode to identify yourself.
- Scan the work order barcode (or type the project name) to identify the project.
- Scan DEACTIVATEJOB — the project is immediately set to inactive.
- Scan your username barcode.
- Scan the work order barcode to identify the project.
- Scan ACTIVATEJOB — the project is immediately restored to active.
Setting Project Status from the Scan Station
The PRSTATUS-name scan lets you update a project's Status field directly from the scan station without opening any admin interface. Scan the project barcode to identify the job, then scan a status code like PRSTATUS-Complete or PRSTATUS-On-Hold — the Status field on that project updates immediately, and managers can see it in the project grid.
Common status values used on shop floors:
PRSTATUS-Complete— marks the job as finishedPRSTATUS-On-Hold— flags the job as paused, waiting on materials or approvalPRSTATUS-In-Progress— confirms work is actively runningPRSTATUS-Ready— signals a job is ready for the next operation
PRSTATUS updates the Status field only — it does not change the Active property. A project can be marked Complete via PRSTATUS and still be active (still accepts scan timers). To prevent scanning, you must also uncheck the Active property or scan DEACTIVATEJOB. Use both together for a fully closed-out job: PRSTATUS to communicate the state to managers, DEACTIVATEJOB to lock the project on the floor.
Status values are free text — you define whatever naming convention works for your shop. The values you scan become the project's Status field value and appear in the Projects grid Status column, reports, and the WIP dashboard.
Re-Activating a Project
Jobs sometimes resume after a pause — a customer adds to an order, a warranty repair comes in, or a rework request arrives. Re-activating a project is just as quick as deactivating it.
- Open Home > Projects.
- Open the Filter panel and click the Inactive folder to find the project.
- Click the project row to open the Properties panel.
- Check the Active checkbox.
- Update the Folder field to the appropriate active folder (e.g., the client name or job type), or clear it to return the project to the unfiltered list.
Alternatively, scan ACTIVATEJOB at the scan station: scan your username, scan the work order barcode, and scan ACTIVATEJOB. The project is immediately available for scanning again on every station on the floor.
Another Way to Prevent Barcode Scanning
The Can log time property is a second switch on every project that controls whether employees can record time against it at all. Unchecking it blocks time logging regardless of whether the project is active — no scan will produce a time entry for that project.
This is useful in two situations where the Active flag alone may not be the right tool:
- Winding down a job — you want to deactivate a project but need a brief window to finish up admin work before the Active flag is toggled. Uncheck Can log time first to immediately stop all new time entries, then uncheck Active and move to the Inactive folder when you are ready.
- Preparing a new project — you are setting up tasks, assigning resources, and configuring a project before it is ready for the floor. Uncheck Can log time while the project is still being built out so no time gets logged against an incomplete setup. Check it again the moment the project is ready to accept scans.
Like the Active property, Can log time is found in the Properties panel — click the project row to open it, then look for the checkbox near the top of the panel alongside the Active and other project-level properties.