Three Ways to Get a Barcode
A barcode label is just the name of something — an employee, a job number, a task — turned into a pattern a scanner can read. When the scanner reads it, Standard Time® sees the same thing as if someone had typed the name. That means you can make labels for anything you already have in the system, and you never have to buy special software or pre-printed labels.
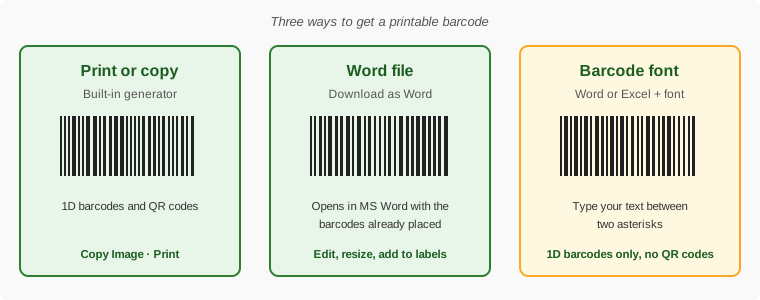
There are three ways to make them:
- Inside Standard Time — type your text into the Generate Barcode or QR Code window, then copy the image or print it right away. Makes both 1D barcodes and QR codes.
- Download as Word — the same window can open your barcodes in Microsoft Word, where you can resize them, add text, or lay them out on a label sheet.
- A barcode font in Word or Excel — install a free font and type your text between two asterisks. Makes 1D barcodes only; a font cannot make QR codes.
Barcode or QR Code?
Standard Time® offers two formats. Both work for the same purpose — a scan that says "this is Buzz" or "this is job 10200" — so pick the one that suits your scanners and your labels.
| 1D Barcode (Code 39) | QR Code | |
|---|---|---|
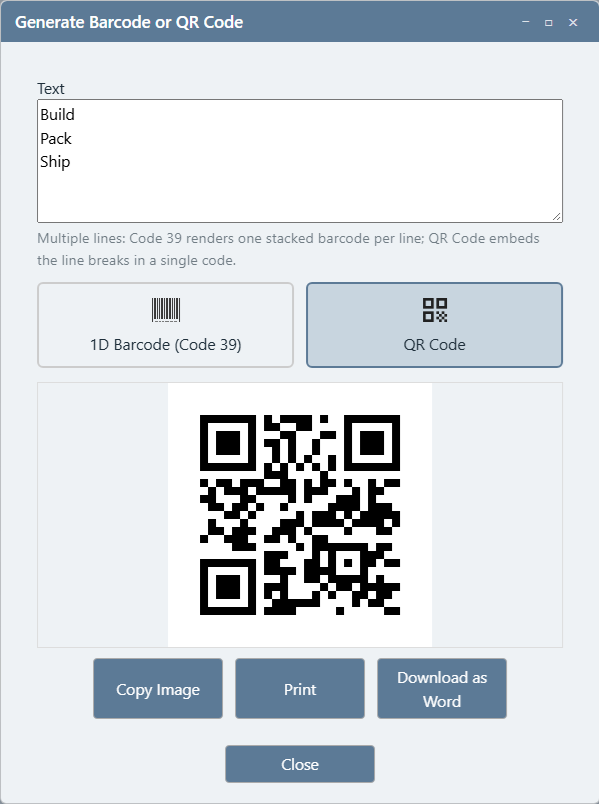
| What it looks like | Vertical black bars, with the text printed underneath | A square pattern of black and white blocks |
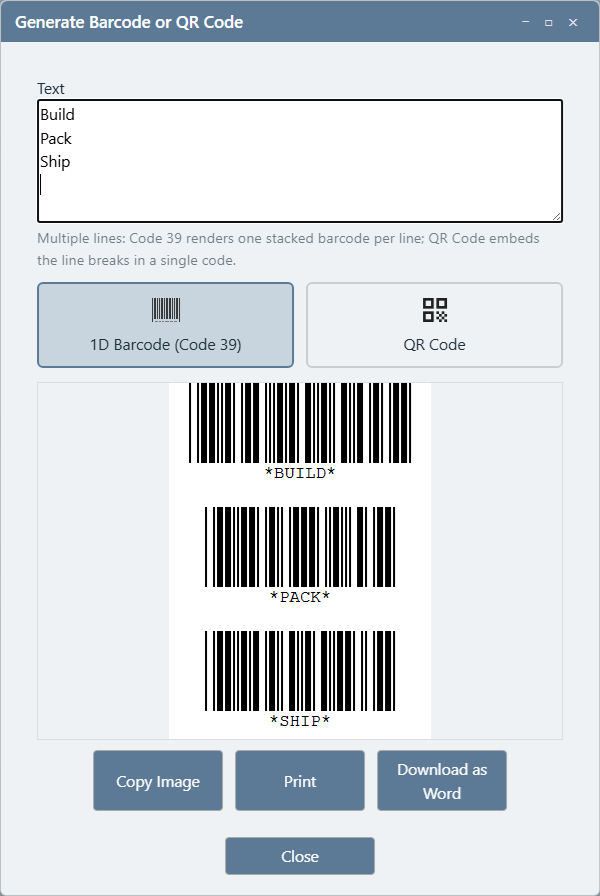
| Several lines of text | One separate barcode is stacked for each line | One code holds every line together |
| Best for | Traditional barcode scanners, and printing a sheet of different labels at once | Phone and tablet cameras, and small labels where space is tight |
| In Word or Excel with the font | Yes | No — the font only makes 1D barcodes |
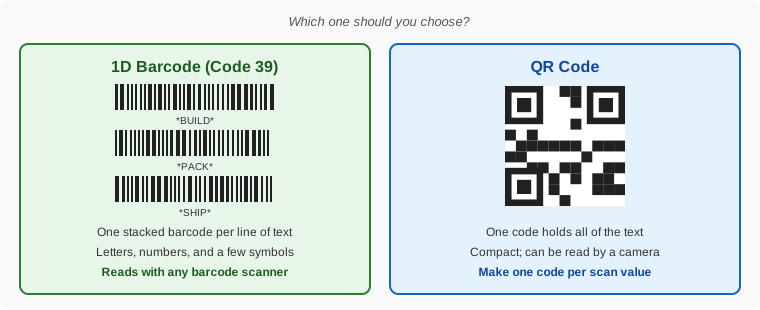
Because a QR code keeps all of its lines in a single code, make one QR code for each thing you want to scan — one for the employee, one for the job, one for the task — rather than one code holding all three.
Generate Them Inside Standard Time
The generator lives on the Scan Barcodes page, so it's always one click away from the place you'll use your labels.
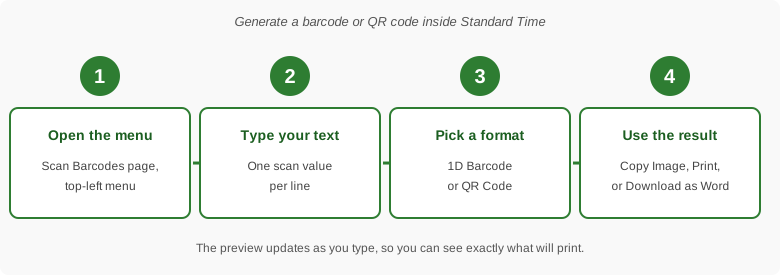
- Open the Scan Barcodes page from the Home screen.
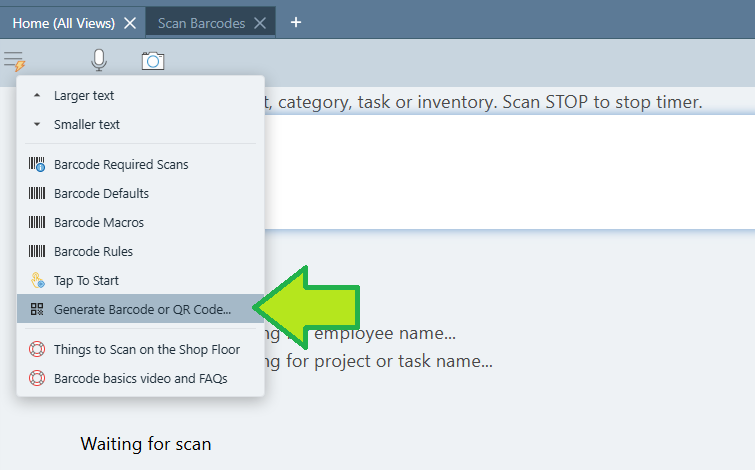
- Click the menu button at the top-left of the page (the small lines-and-pencil icon) and choose Generate Barcode or QR Code…
- Type the text you want in the Text box — one value per line.
- Choose 1D Barcode (Code 39) or QR Code. The preview below updates right away.
- Click Copy Image, Print, or Download as Word.
Step 1 — Open the menu item
On the Scan Barcodes page, the menu button at the top-left also holds Barcode Required Scans, Barcode Defaults, Barcode Macros, Barcode Rules, Tap To Start, and shortcuts to the "Things to Scan on the Shop Floor" help page. Generate Barcode or QR Code… is in the same list.
Step 2 — Type your text and choose a format
Type each value on its own line. In the example below, three task names — Build, Pack, and Ship — each become their own barcode. The text printed under each barcode is wrapped in asterisks (*BUILD*); those are the start and stop markers that Code 39 barcodes always carry, and Standard Time® adds them for you.
Step 3 — Copy, print, or download
- Copy Image — puts the picture on your clipboard so you can paste it into Word, Excel, an email, a label program, or anywhere else that accepts pictures.
- Print — sends the barcodes straight to your printer. Good for a quick label or two.
- Download as Word — opens a Microsoft Word document with the same barcodes. See the next section.
Barcode labels can only include characters Code 39 supports: letters, numbers, and a few symbols (dash, period, space, $, /, +, and %). Standard Time® prints the letters in uppercase on the barcode.
Download as Word
Click Download as Word and Microsoft Word opens with the same barcodes you saw in the preview, one under the other and ready to edit. From there you can resize them, add a job description beside each one, copy them onto a sheet of label stock, or print as many copies as you need.
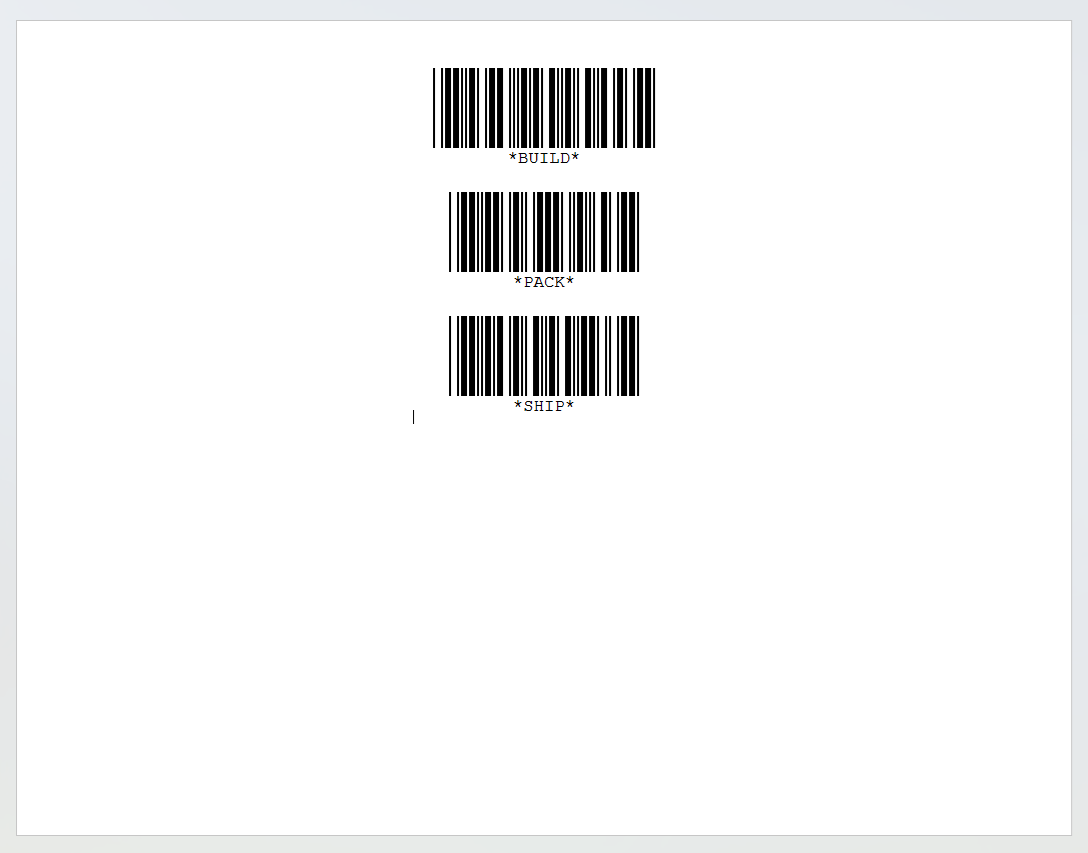
This is the easiest way to print labels for many employees, jobs, or tasks at once: type every value in the generator (one per line), download as Word, and print the page.
Make Barcodes in Word or Excel with a Font
If you'd rather build labels yourself — or you already keep your job and employee lists in Excel — you can make 1D barcodes with a barcode font. A barcode font is an ordinary font, like Arial or Times New Roman, except that each letter is drawn as a barcode pattern. Type your text, pick the font, and the text becomes a barcode.
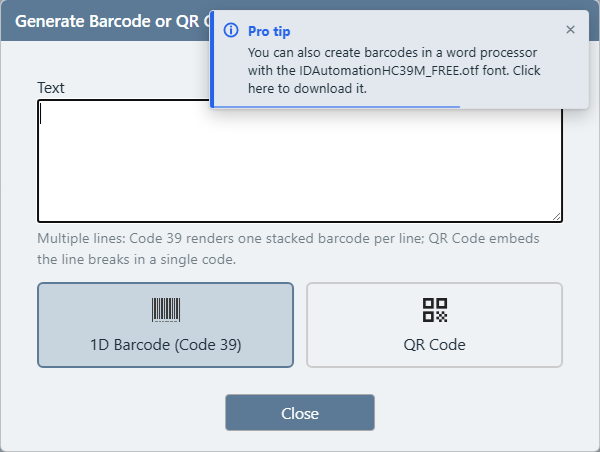
The Generate window even reminds you. When you open it, a Pro tip message appears in the corner pointing to the free IDAutomationHC39M font; click the message to download it.
- Download the font from the link above. If it arrives in a zip file, open the zip first.
- Right-click the font file and choose Install (or Install for all users). Close and reopen Word so it notices the new font.
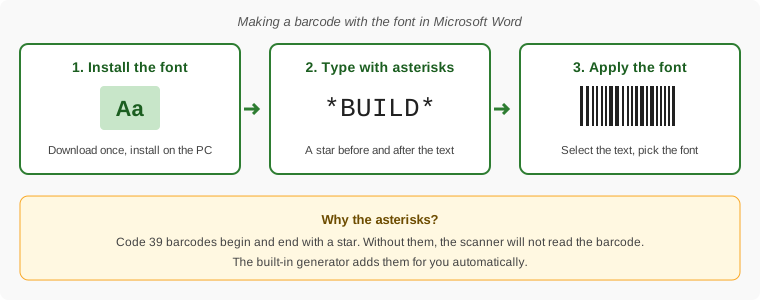
- In Word, type your text with an asterisk (*) before and after it — for example
*BUILD*. - Select the text and change its font to IDAutomationHC39M. Make the font size larger if the barcode looks cramped.
- Print the page, or copy the barcodes onto your label sheet.
In Excel, the same idea works for a whole list. Put your employee names, job numbers, or task names in one column. In the next column, join an asterisk, the value, and an asterisk, then set that column's font to IDAutomationHC39M. Fill the formula down and every row becomes a barcode.
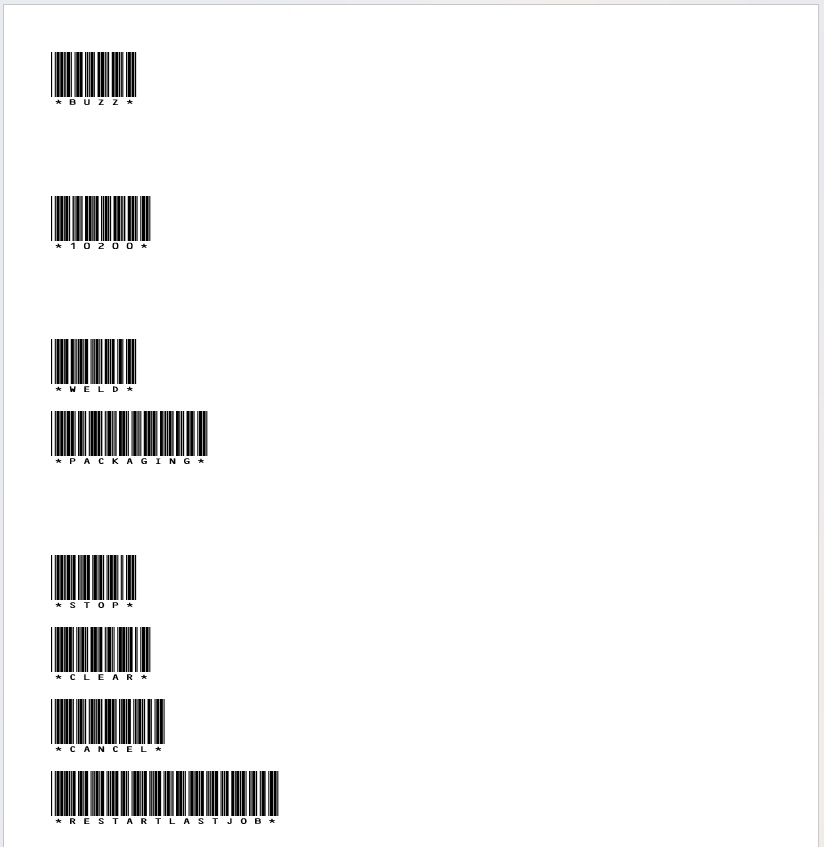
A sheet of labels built in Word with the barcode font, ready to print.
Scan Your Labels to Start and Stop a Timer
Once your labels are printed, here is what they do. Employees scan them at a computer, tablet, or phone showing the Scan Barcodes page. A timer starts when someone scans who they are, what job they're on, and what task they're doing — and it stops when they scan STOP. Standard Time® saves the result as a time log.
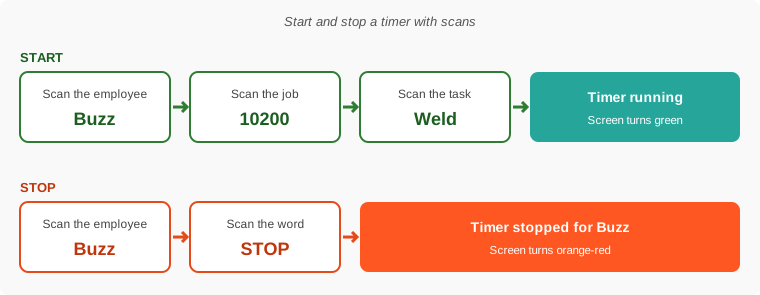
Starting a timer
- Open the Scan Barcodes page.
- Scan the employee label.
- Scan the job (project) label.
- Scan the task label.
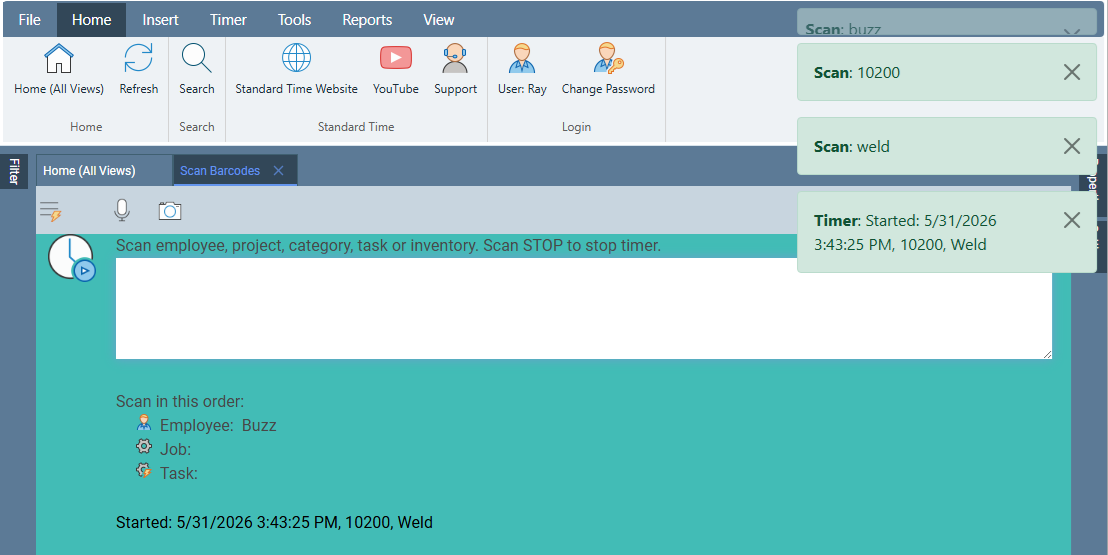
- A Timer: Started message pops up with the date, time, job, and task, and the page turns green.
The page's Scan in this order checklist walks people through it: Employee, then Job, then Task. In the screenshot below, Buzz scanned job 10200 and task Weld, and the timer started at 3:43 PM.
Stopping a timer
- Scan the employee label so Standard Time® knows whose timer to stop.
- Scan the STOP label.
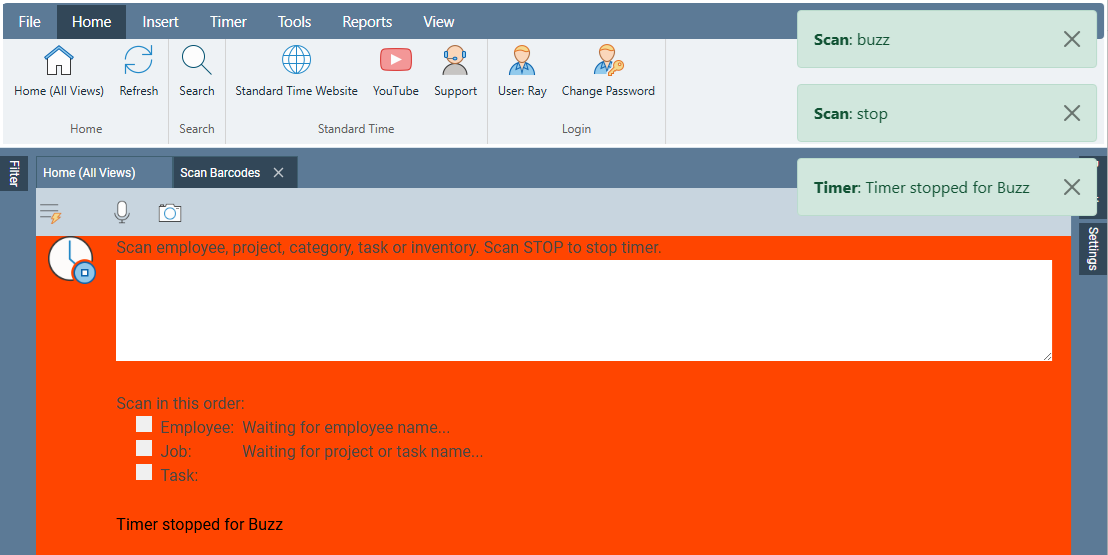
- A Timer stopped message appears and the page turns orange-red.
Here Buzz scanned the employee name and then STOP. The message "Timer stopped for Buzz" confirms that the time log has been closed.
Make a STOP label too. Type STOP into the Generate window like any other value and print it. Many shops post a large STOP label at every scan station.
To see the finished time logs, open the Time Logs grid — Time Logs: The Results of Barcode Scans shows exactly where they land. For everything else you can scan — pauses, multiple timers, job status, inventory — see Things to Scan on the Shop Floor and the full Shop Floor Barcode Scanning walkthrough.
Tips and Common Surprises
| What you see | Why, and what to do |
|---|---|
| The barcode I made with the font won't scan. | Check that the text starts and ends with an asterisk (*BUILD*) and that the whole thing, asterisks included, is in the barcode font. Also make the font bigger — a tiny barcode is hard to read. |
| The font isn't in Word's font list. | Close and reopen Word after installing the font. If it still doesn't appear, install the font for all users. |
| My QR code scans as several lines of text at once. | A QR code keeps every line in one code. Make one QR code per scan value instead of one code for the whole list. |
| I can't make a QR code with the font. | The font only draws 1D barcodes. Use the Generate Barcode or QR Code window instead. |
| A scan was read but nothing matched. | The text on the label has to match the name or code in Standard Time®. Print labels for existing employee names, job numbers, and task names exactly as they appear. |
| A scan shows lowercase text in the screenshots. | The example screenshots scan buzz in lowercase and still find the employee Buzz, so you don't need to match capitalization. |
- Shop Floor Barcode Scanning — How It Works — the full scan workflow after your labels are printed
- Things to Scan on the Shop Floor — every item you can make a label for
- Set Up Your Shop Floor for Barcode Scanning — labels, hardware, and where to post them
- Barcode Macros — one label that plays back several scans
- ADDTIMER and ENDTIMER — run more than one timer at once
- Time Logs: The Results of Barcode Scans — see the time logs your scans create
- Creating Users and Employee Barcodes
- Creating Projects and Job Barcodes
- FAQ: Barcode Scanning