How to Connect Standard Time® Windows Client to SQL Server
Completion time: 2 hours
1. Check Server Prerequisites
Make sure your server has these prerequisites for sharing data with workstations.
- Microsoft SQL Express 2016 or above
- SQL Server Management Studio (SSMS)
- Microsoft .NET4.8 or above
- Microsoft Windows 10 or Windows Server 2016
- 16Gb RAM
- 500Gb HD
- 100 MbE Ethernet connection or faster
2. SQL Server Preparation
- Open SQL Server Management Studio (SSMS)
- Connect to the server instance you’ll put Standard Time on (example: SQLEXPRESS)
- Right-click on the top-level item and choose ‘Properties’
- Click Security
- Choose ‘SQL Server and Windows Authentication mode’
- Click ‘Connections’
- Choose ‘Allow remote connections to this server’
- Click OK
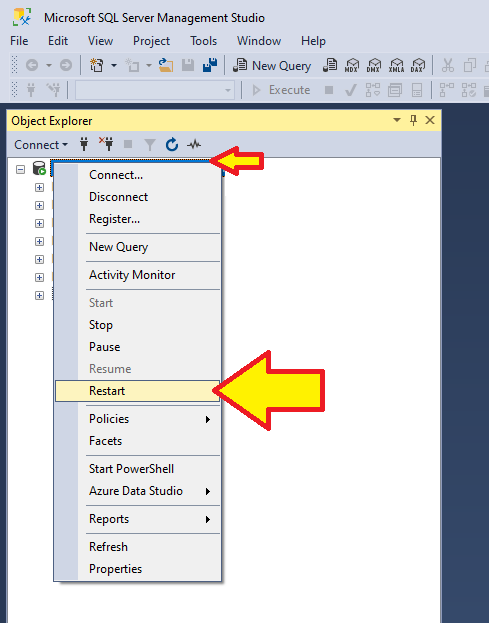
- Right-click on the top-level item again
- Choose Restart (if you were told you must restart the service)

3. SQL Server Configuration Manager
See images below
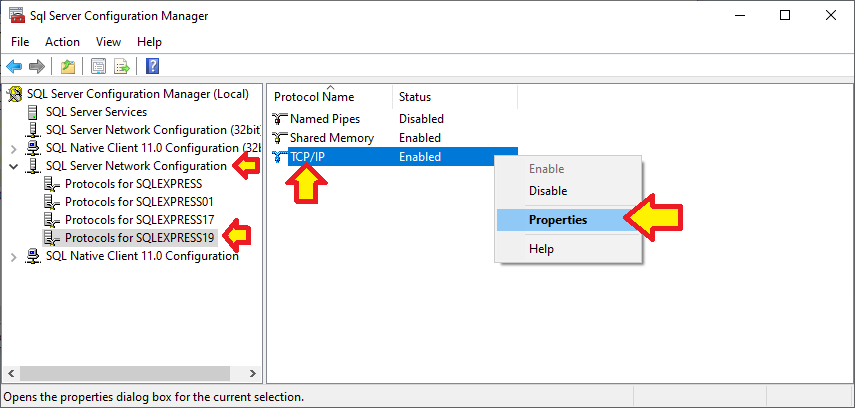
- Run SQL Server Configuration Manager (Run: SQLServerManager16.msc)
- Open SQL Server Network Configuration
- Click the SQLEXPRESS or SQLSERVER you'll be putting Standard Time® on
- Right-click TCP/IP on the right
- Choose Properties
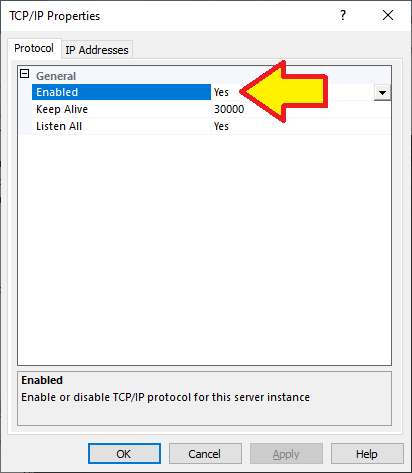
- Choose Yes" for "Enable"
- Click "Apply"
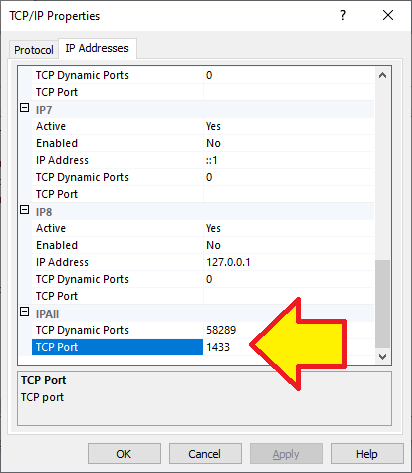
- Click the "IP Addresses" tab at the top
- Scroll to the very bottom
- Enter 1433 into the IPAll "TCP Port" field
- Click OK
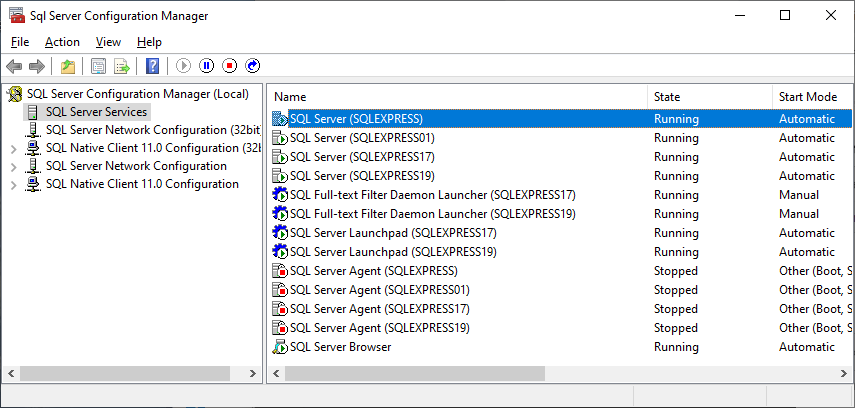
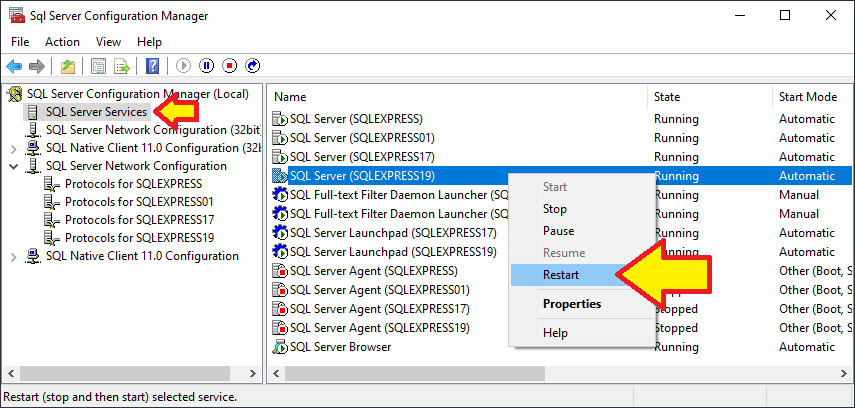
- Click SQL Server Services
- Right-click the SQLSERVER item on the right
- Choose "Restart"
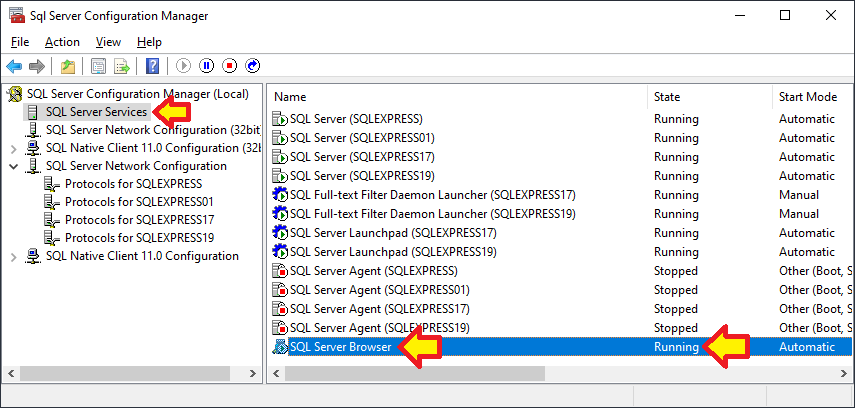
- Right-click SQL Server Browser
- Choose Properties
- Set the service to start "Automatic"
- Right-click the service
- Choose "Start"
4. Open Windows Firewall for SQL Server
See images below
- Open Windows Firewall
- Click Advanced Settings
- Click Inbound Rules
- Click "New Rule" at the right
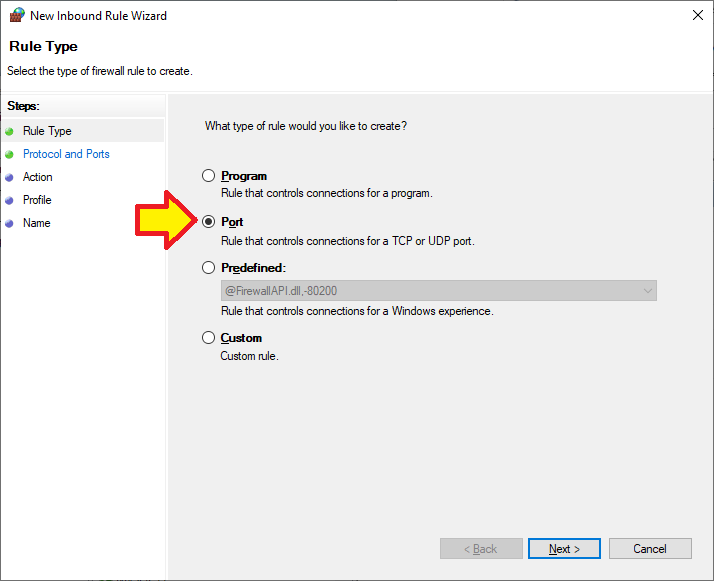
- Choose "Port" then click Next
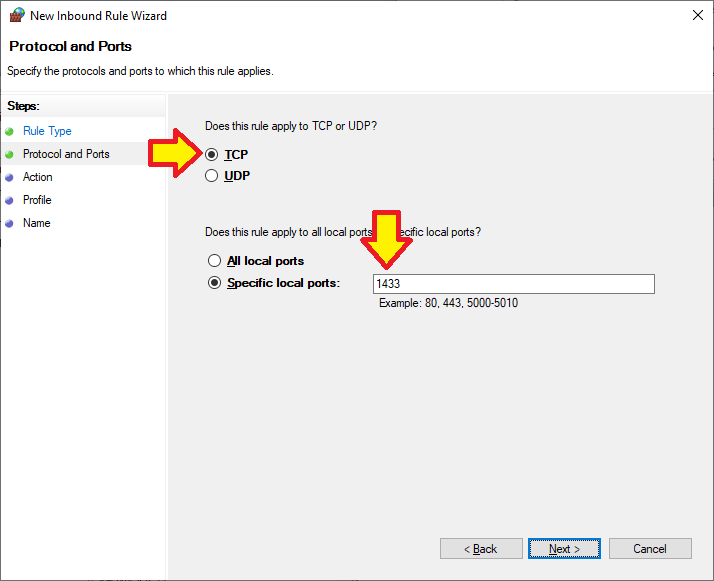
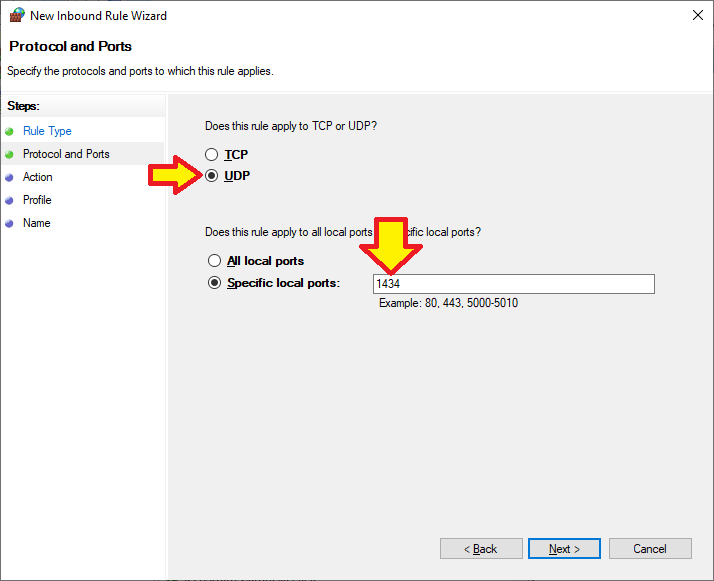
- Choose TCP
- Enter "1433" into "Specific local ports", then click Next
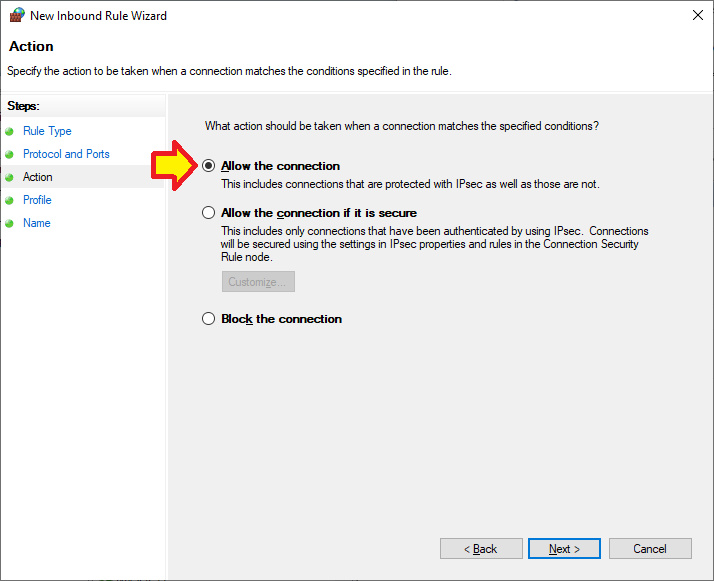
- Choose "Allow the connection", then click Next
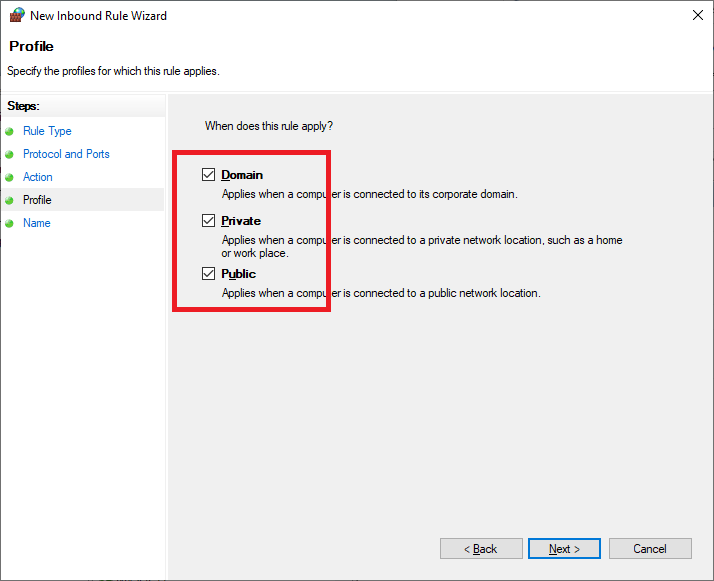
- Check all the options, then click Next
- Enter "SQL TCP 1433" for the Name, then click Finish
- Repeat steps 4 - 9 using UDP and 1434 for the options (see image below)
5. Create "Standard Time" Database
- Return to SQL Server Management Studio (SSMS)
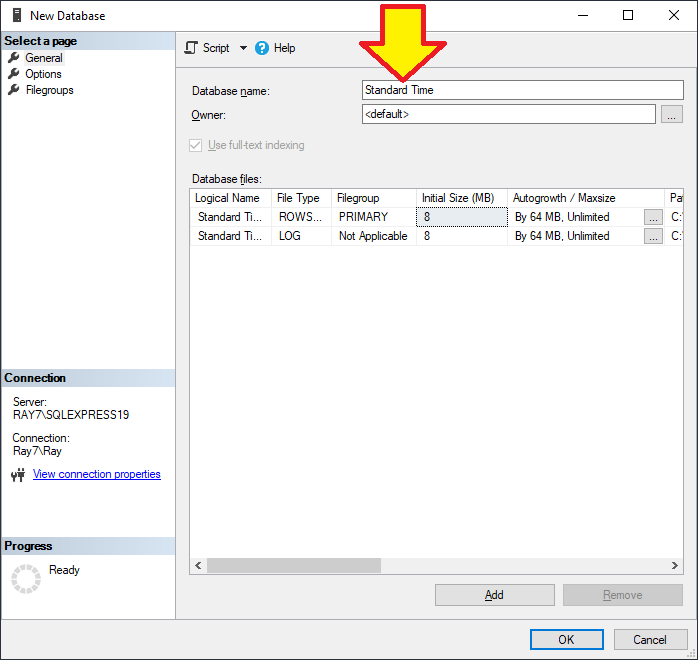
- Right-click "Databases"
- Choose New Database...
- Enter "Standard Time" for the name, then click OK
6. Create a SQL Login to access the database
See images below
- Open Security, Logins
- Right-click Logins
- Choose New Login...
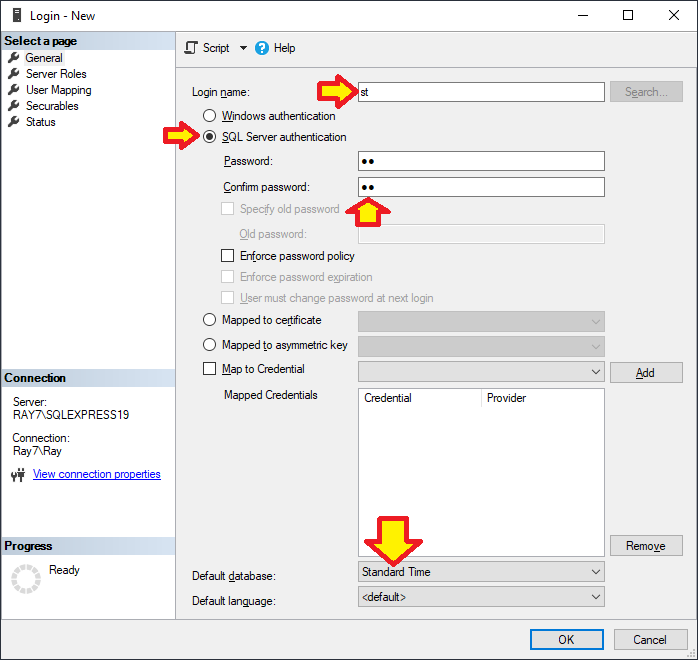
- Create a login named "st" with password "st" (as shown below, in lower-case)
- Choose "Standard Time" for the default database
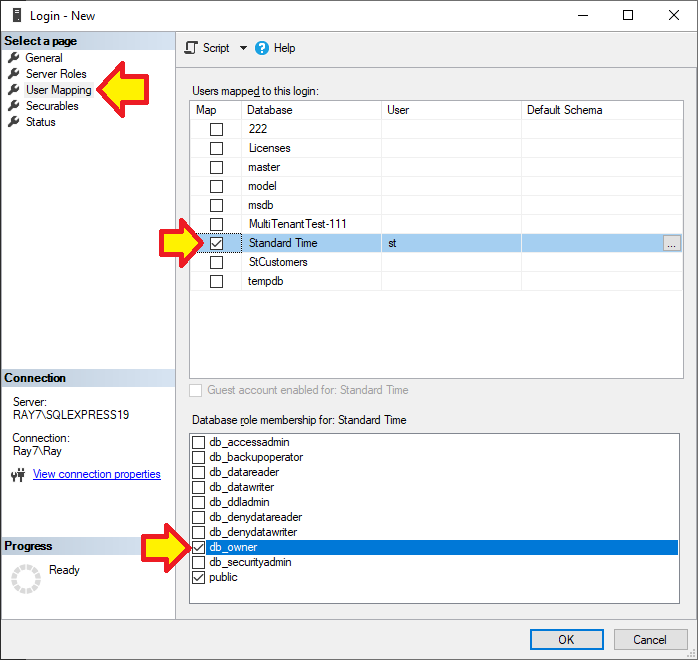
- Click "User Mapping" in the upper-left
- Click "Standard Time"
- Make sure to place a check next to it
- Choose "db_owner" rights at the bottom
- Click OK
7. Create a Credentials file to connect to SQL
See images below
Pro tip: Use a "Windows Authentication" login instead of "SQL Server Authentication". Windows authentication is more secure, and does not require exposing the login password in cleartext as described above in step 19. Skip steps 18 and 19.
- Open the Control Panel
- Choose System and Security
- Open Administrative Tools
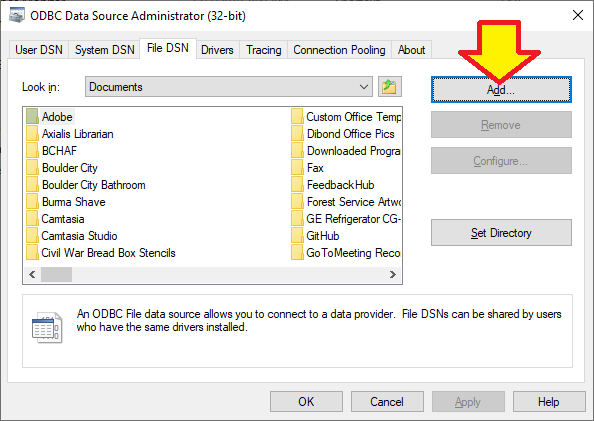
- Open Data Sources (ODBC)
- Click the File DSN tab
- Click Add
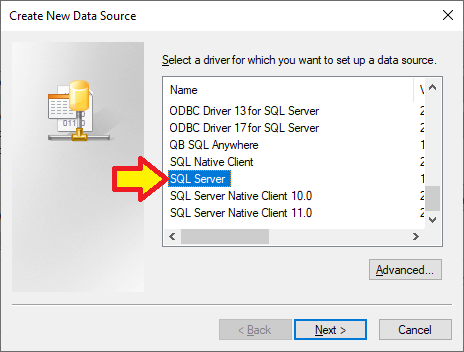
- Choose ‘SQL Server’ driver and click Next
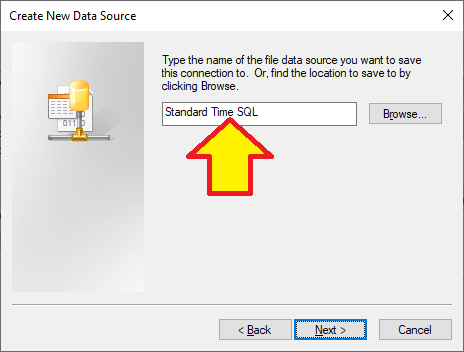
- Enter ‘Standard Time SQL’ and click Next
- Click Finish
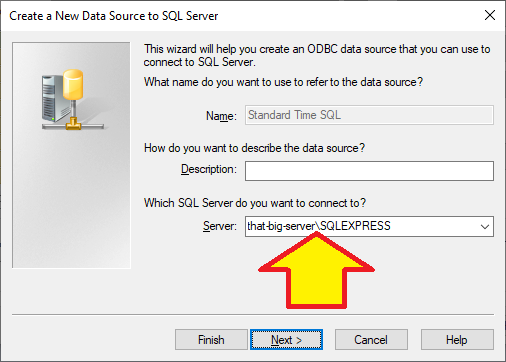
- Choose the correct server and instance and click Next
- Choose ‘Windows authentication’ or ‘With SQL Server authentication’
- Enter the correct login and password that has db_owner rights and click Next
- Click ‘Change the default database to’
- Choose ‘Standard Time’
- Click Next, Finish
- Click Test
- Click OK to close all dialogs
- Look in your Documents folder for this new file named Standard Time SQL.dsn
- If you chose ‘With SQL Server authentication’ for authentication, you must open the File DSN in Notepad and enter a new line at the end: PWD=yourpassword
Pro tip: Use a "Windows Authentication" login instead of "SQL Server Authentication". Windows authentication is more secure, and does not require exposing the login password in cleartext as described above in step 19. Skip steps 18 and 19.
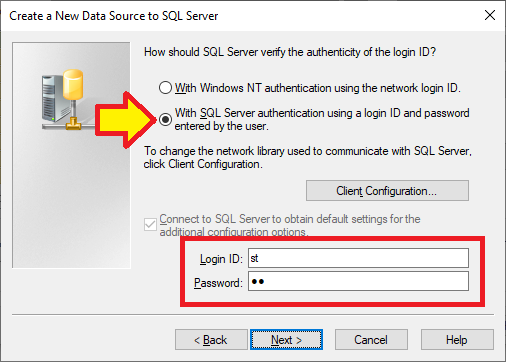
Pro tip: Use a "Windows Authentication" login instead of "SQL Server Authentication". Windows authentication is more secure, and does not require exposing the login password in cleartext.
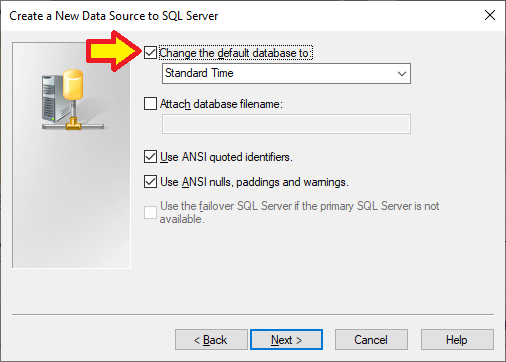
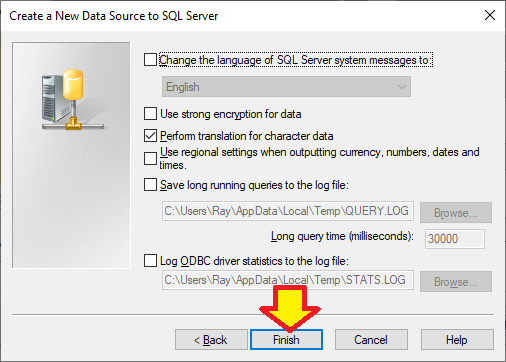
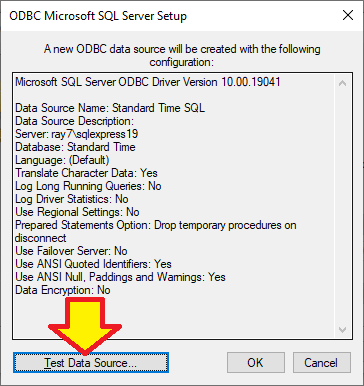

Pro tip: A "Windows authentication" login does not require this last step, and does not require you to expose passwords in cleartext.
8. Connect ST to SQL Server Database
- Install Standard Time (ST) on a client workstation
- Copy the credentials file created earlier to the Documents folder of the workstation
- Run ST
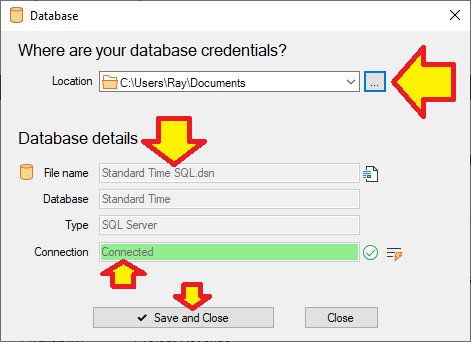
- Optionally choose File, Database
- Click the "..." button
- Navigate to the Documents folder
- Choose "Standard Time SQL.dsn"
- ST should connect to SQL without errors
- Click OK
- ST will restart to apply the changes
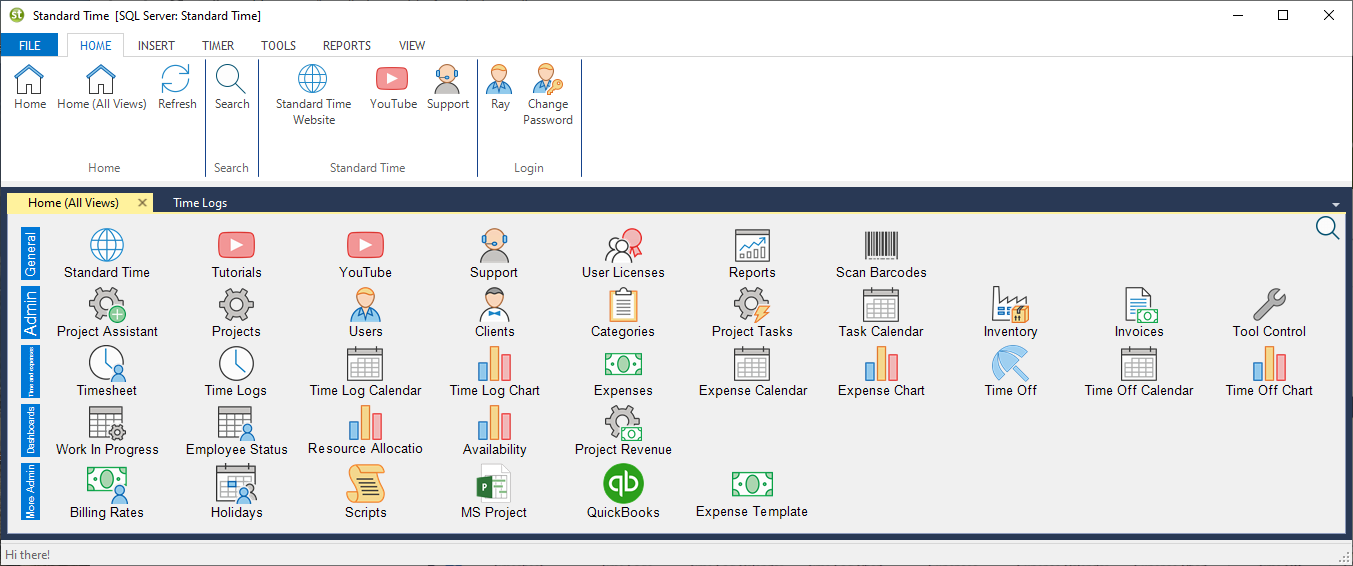
- Look for the words "SQL Server: Standard Time" in the title bar to signify connection

9. Copy Credentials file
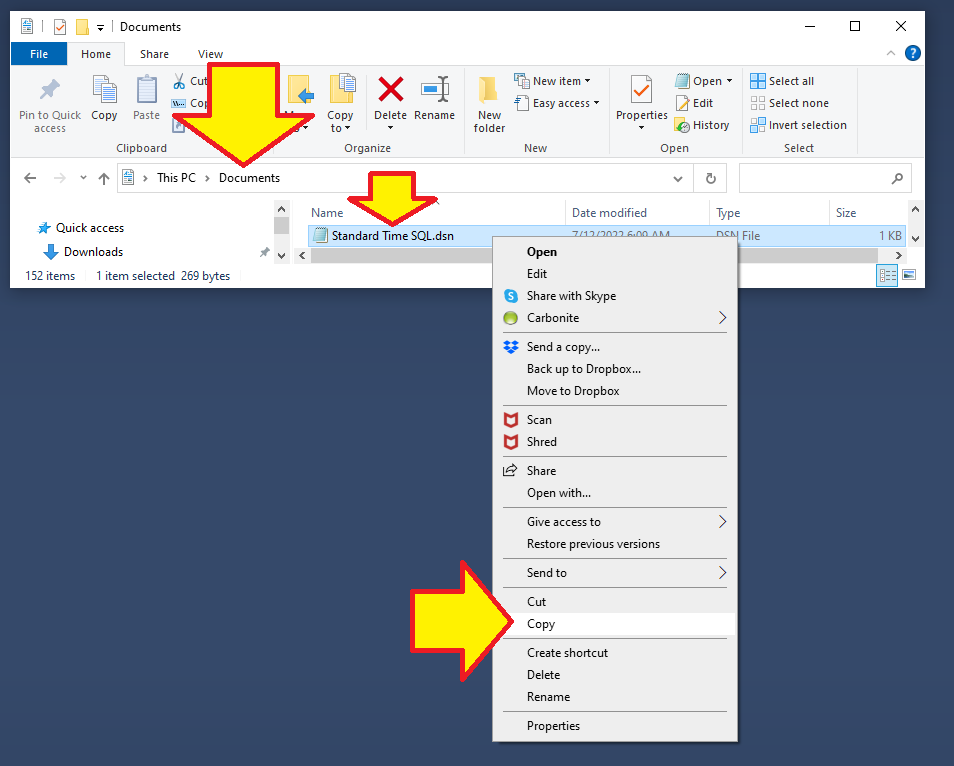
- Open your Documents folder in File Explorer
- Find the "Standard Time SQL.dsn" credentials file
- Copy the file to every other workstation Documents folder that will use ST
Pro tip: The credentials file can be placed in the same folder as the executable. If you put the executable on a shared server folder, the credentials file can also be placed in that folder.
10. Install BC for Barcode Scanning
- Open your Documents folder
- Copy "Standard Time SQL.dsn" to another Windows workstation Documents folder
- Navigate to c:\program files (x86)\standard time\utilities
- Copy the entire BC folder to the other Windows desktop
- Double-click bc.exe to run it
- Make sure it connects to SQL without errors or pop-ups
Pro tip: The credentials file can be placed in the same folder as the BC executable. If you put BC on a shared server folder, the credentials file can also be placed in that folder.

