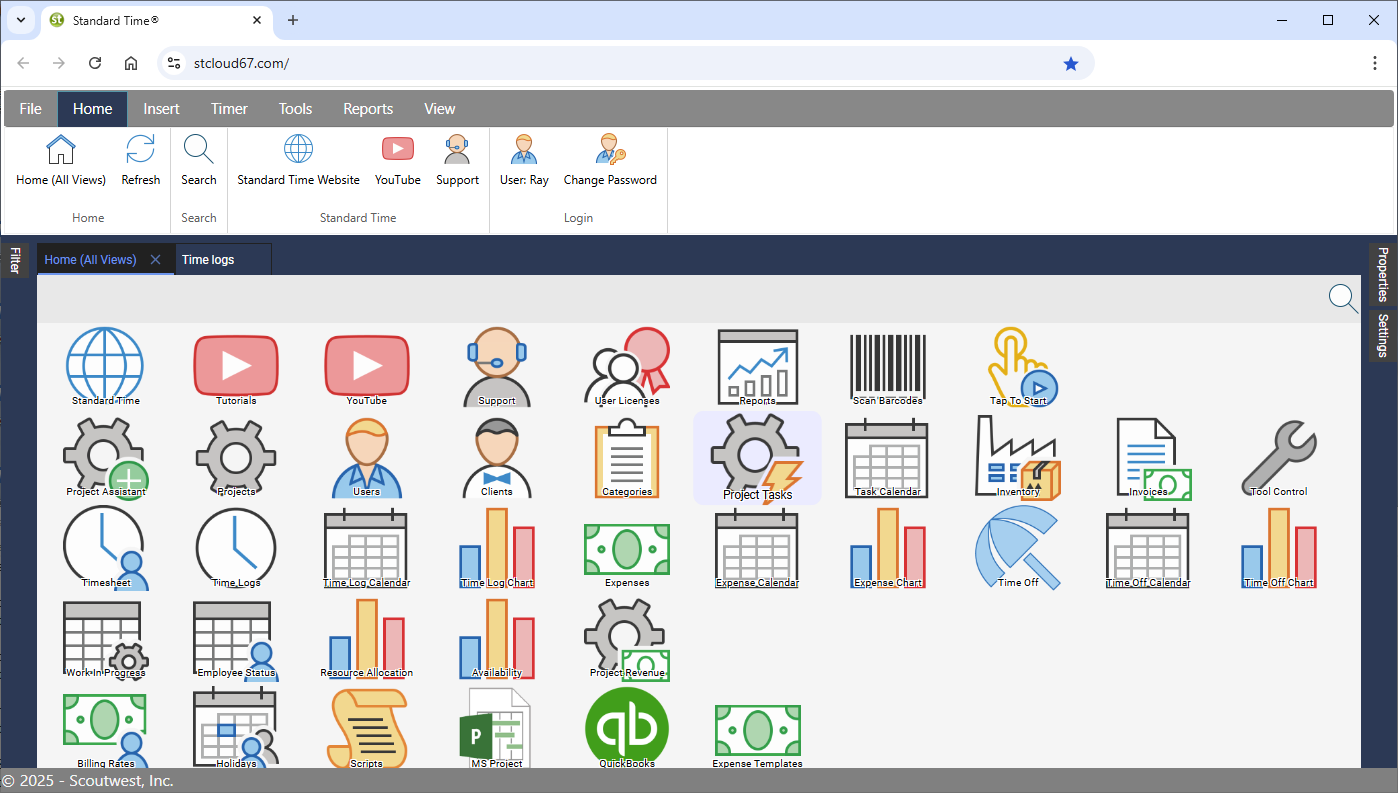
How to Install the Standard Time Web Edition
Completion time: 2 hours
1. Check Server Prerequisites
Make sure your server has these prerequisites for hosting a web application.
PRO Tip: Your IIS Web server and SQL Server can run on different computers. It is not necessary for both to run on the same system.
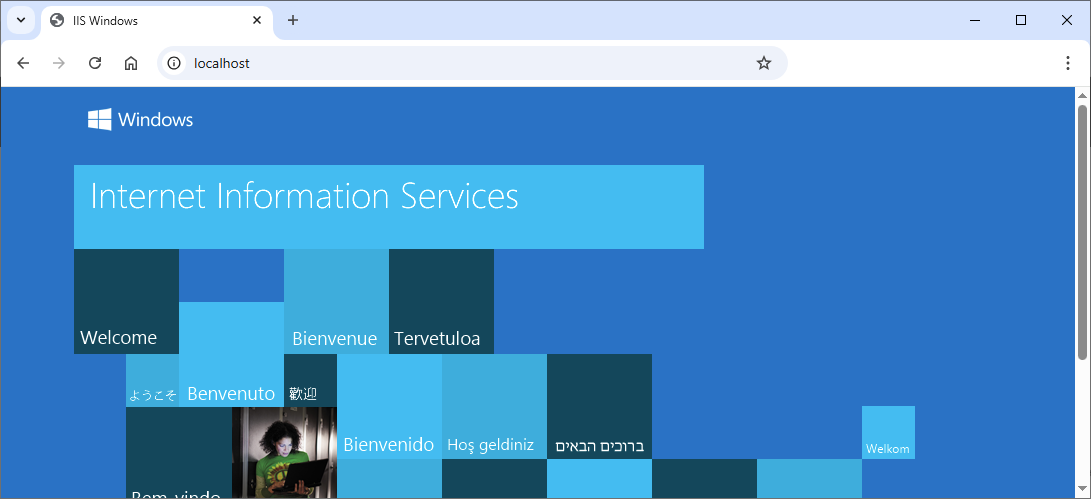
PRO Tip: Consider testing your IIS server by nativigating to your web URL in a browser before proceeding with the rest of the installation.
PRO TIP: Consider testing your database authentication using SQL Server Management Studio (SSMS) before proceeding with the rest of the installation.
- Microsoft IIS Web Server version 10 or above
- Microsoft SQL Express 2016 or above
- SQL Server Management Studio (SSMS)
- Microsoft .NET4.8 or above
- Microsoft Rewrite Module 2.1 or above
- Microsoft Windows 10 or Windows Server 2016
- 16Gb RAM
- 500Gb HD
- 100 MbE Ethernet connection or faster
PRO Tip: Your IIS Web server and SQL Server can run on different computers. It is not necessary for both to run on the same system.
PRO Tip: Consider testing your IIS server by nativigating to your web URL in a browser before proceeding with the rest of the installation.
PRO TIP: Consider testing your database authentication using SQL Server Management Studio (SSMS) before proceeding with the rest of the installation.
2. Download Web Application
Download stweb.zip from the strdtime.com website.
Contact support for the exact filename to download. There may be more recent updates to download.
Contact support for the exact filename to download. There may be more recent updates to download.
3. Prepare Application Folder
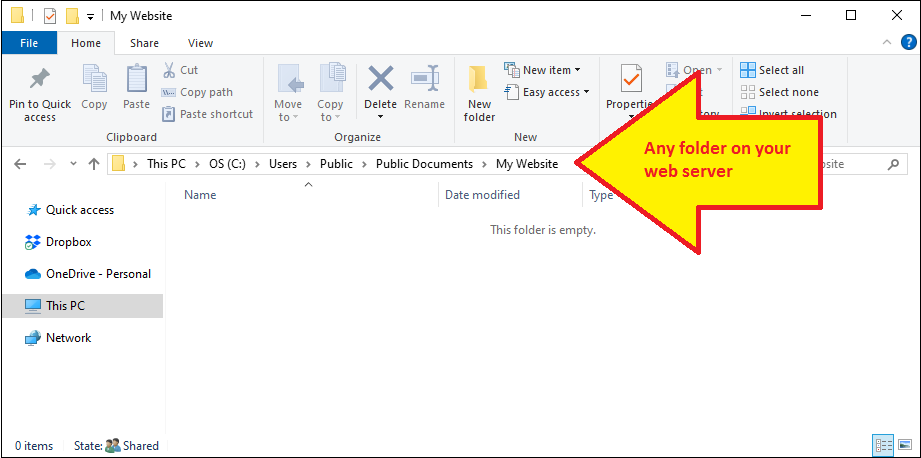
This folder will hold the Standard Time application files, used by your IIS server to present the program to end-users. Later we'll tell IIS where these files are.
- Create a new folder on your web server that will hold the ST web application
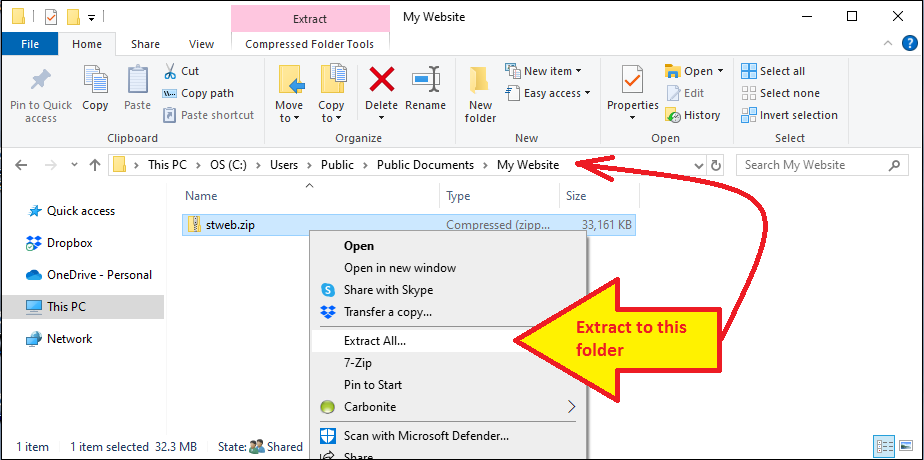
- Place the recently downloaded stweb.zip into this new folder
- Right-click the zip file and choose Extract All...
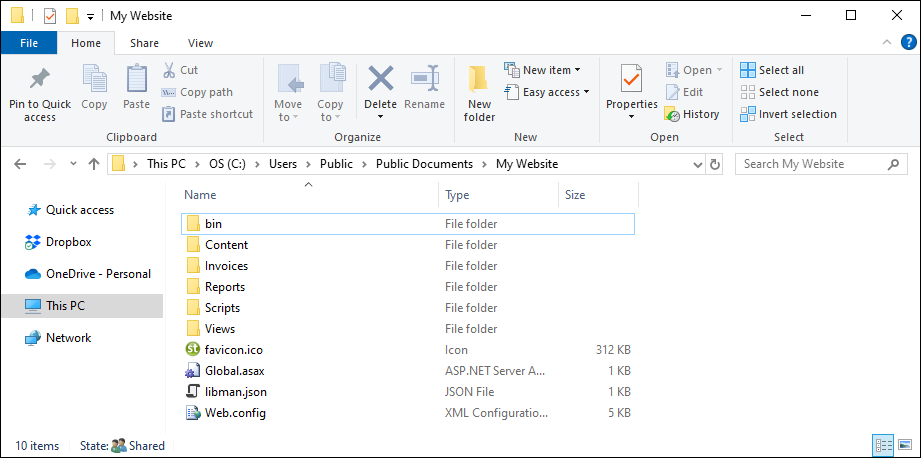
- Extract all the files into this new folder
- Optional: You can delete the zip file after files have been extracted, or keep a backup for historical and restoration purposes
4. Create Credentials File
This file will contain authentication credentials to connect to your existing SQL Server database. I.e. SQL Login username, password, and other values. The ST application will use this to connect to SQL and display your data.
Example:
[ODBC]
DRIVER=SQL Server
UID=MySqlLoginName
PWD=onlyifnotwindowsauthentication
DATABASE=Standard Time
SERVER=myservername\mysqlinstancename
Trusted_Connection=Yes
PRO Tip: Keep a backup of this file for restoration purposes
- Collect the following authentication values for your database
- SQL Server name or IP address (often the machine name works for this)
- SQL Server instance name (often SQLEXPRESS or SQLSERVER)
- SQL Login name
- SQL authentication method (Windows Authentication or SQL Authentication)
- SQL Password (if not using Windows Authentication)
- SQL Database name
- Optional: Test authentication by using SQL Server Management Studio (SSMS)
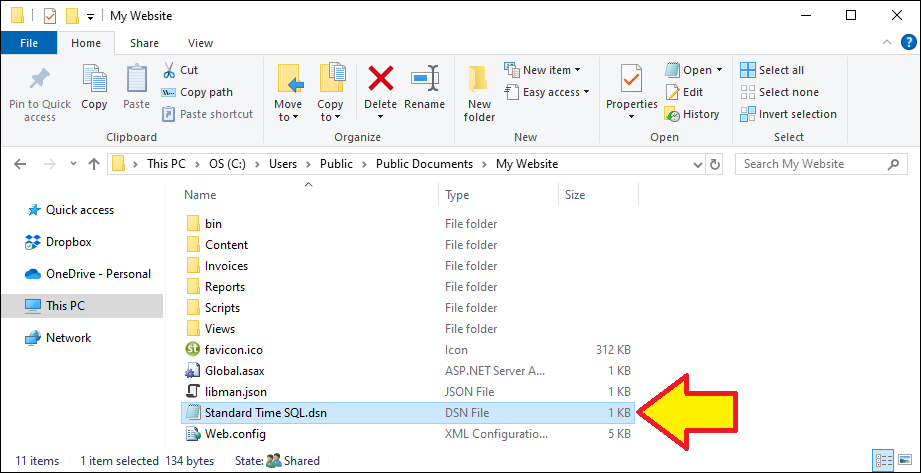
- Create a new text file in the folder above
- Name it "Standard Time SQL.dsn"
- Open the file in Notepad
- Enter SQL Server authentication credentials using the template below
- Replace the examples with your own SQL credentials
Example:
[ODBC]
DRIVER=SQL Server
UID=MySqlLoginName
PWD=onlyifnotwindowsauthentication
DATABASE=Standard Time
SERVER=myservername\mysqlinstancename
Trusted_Connection=Yes
PRO Tip: Keep a backup of this file for restoration purposes

Example credentials file contents:
[ODBC]
DRIVER=SQL Server
UID=MySqlLoginName
PWD=onlyifnotwindowsauthentication
DATABASE=Standard Time
SERVER=myservername\mysqlinstancename
Trusted_Connection=Yes
Change these values to your SQL Server credentials.
PRO Tip: Consider using Windows Authentication in SQL Server for security reasons. The old "SQL Authentication" requires you to expose the password here in this credentials file, while Windows Authentication and "Trusted_Connection" does not.
PRO Tip: Keep a backup of this credentials file for restoration purposes.
5. Create Website in IIS
This step will tell your server where the ST application files are located.
- Open IIS (Internet Information Serivces) on your web server
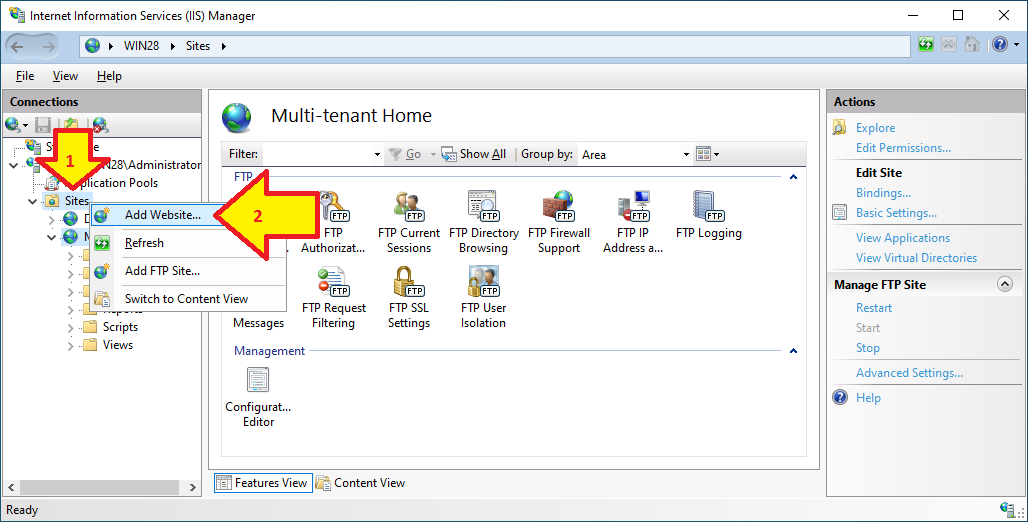
- Open "Sites" in the navigation tree at the left
- Right-click Sites
- Choose Add Website...
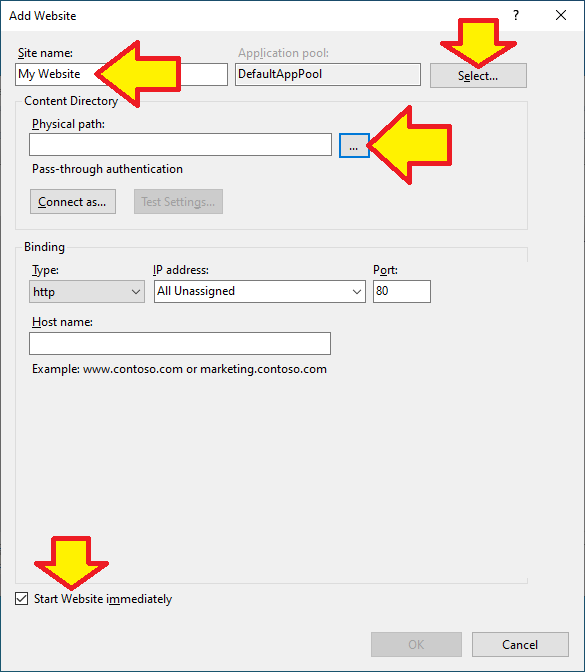
- Enter "Standard Time" as a name for the website
- Choose an Application Pool (Use the default application pool if unsure) Remember this application pool for possible use in SQL Server below.
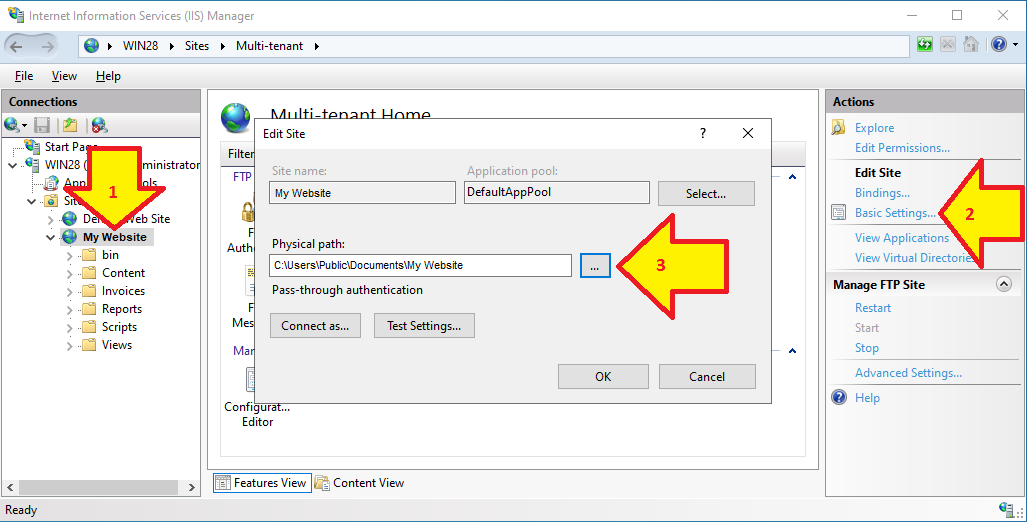
- Click the "..." button next to "Physical path"
- Navigate to the application folder created above
- Make sure "Start website immediately" is checked
6. Create SQL Login for IIS
If your IIS server is on a different machine than SQL Server, you may need to create a SQL Login for IIS. Here are the general steps.
- Open SQL Server Management Studio (SSMS)
- Open Security folder (I.e. The security folder at the same level as the Databases. Not the security folder within each individual database)
- Right-click on Logins
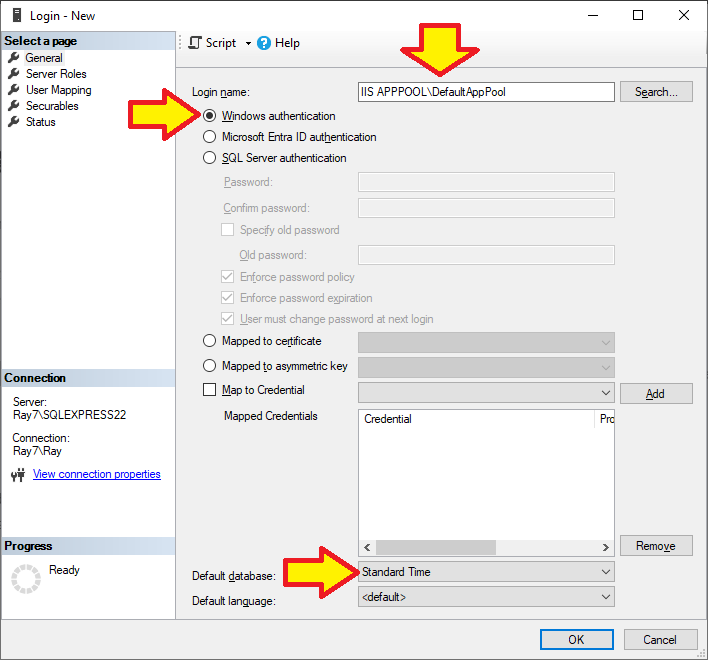
- Choose "New Login"
- In the Login name field, type IIS APPPOOL\YourAppPoolName. (Do not click search.) The application pool name used here is taken from the website created in IIS above.
- Choose "Standard Time" for the Default database
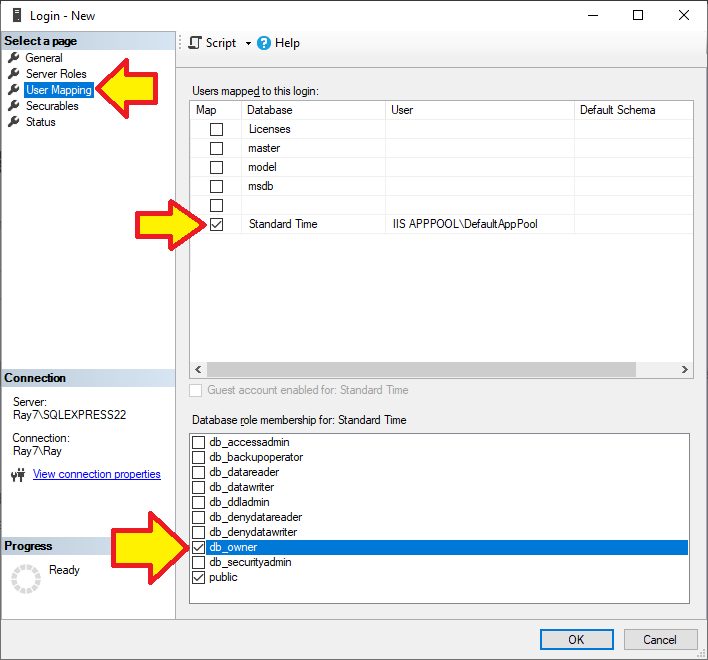
- Click "User Mapping" at the left
- Place a check next to the "Standard Time" database
- Click "db_owner" in the "Database role membership" section at the bottom
- Click OK
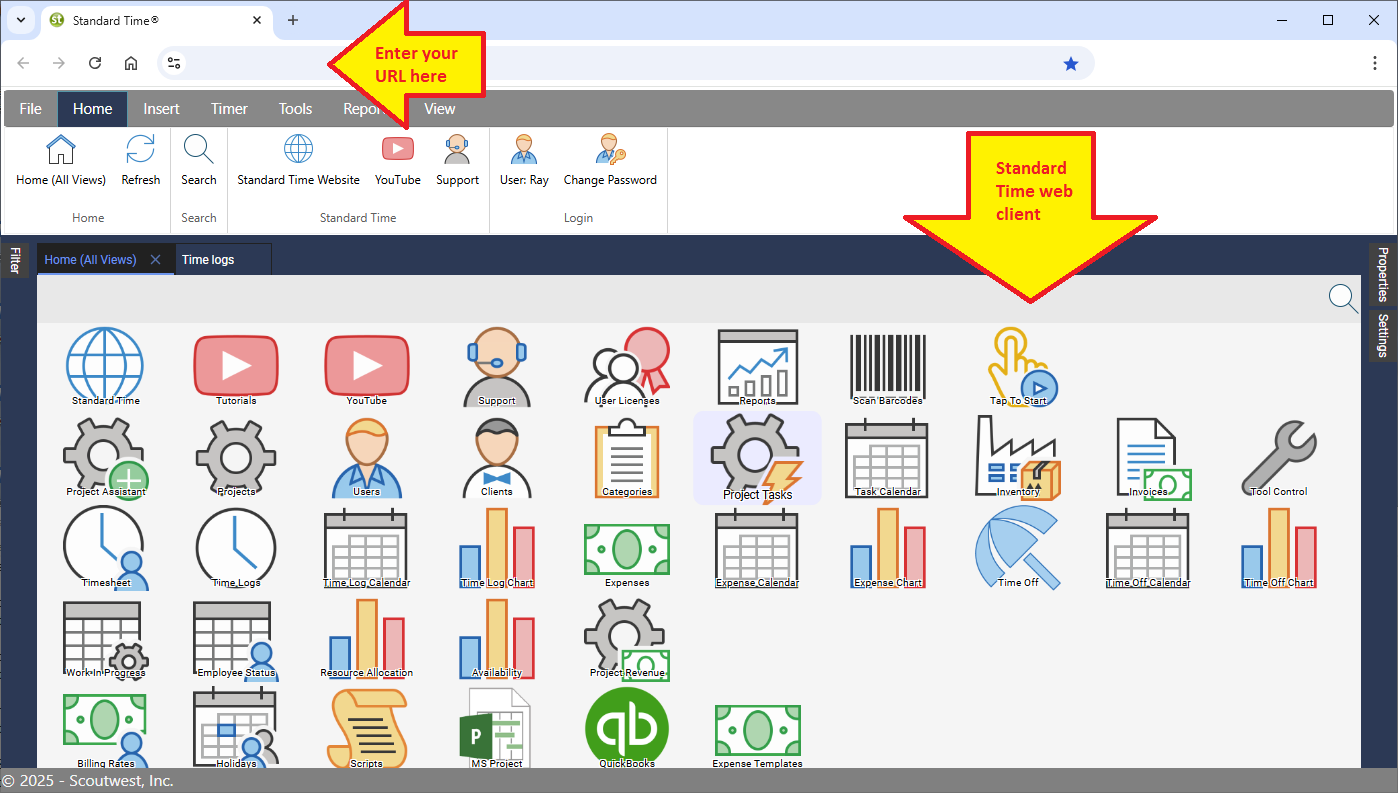
7. Navigate To New Website
- Open Google Chrome
- Navigate to the URL or your new website
- The Standard Time web application should open
8. Troubleshooting
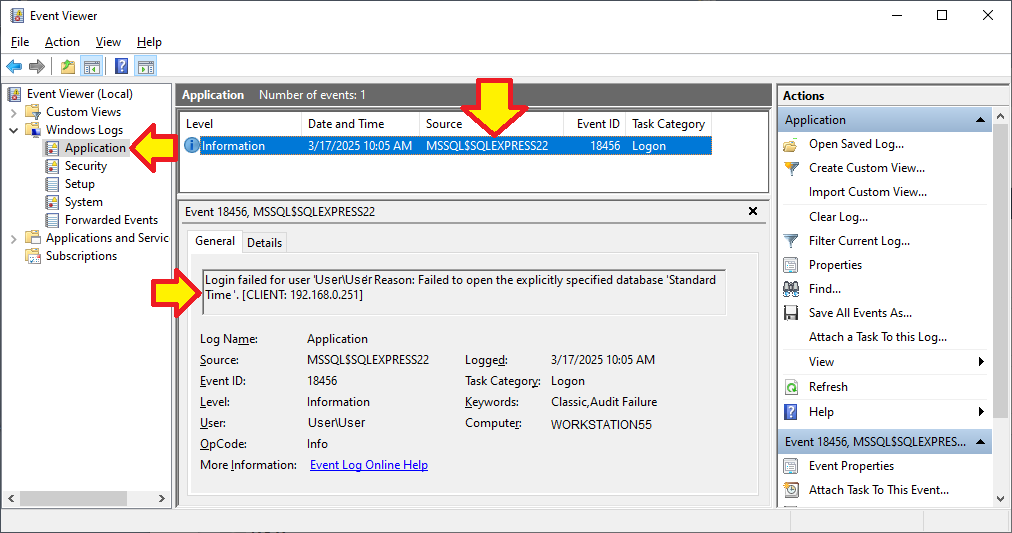
If the Standard Time Web Edition reports a database connection error, you may need to find the exact issue using the Event Viewer, as shown below.
- Search for "Event Viewer" and open it
- Open Windows logs
- Right-click on the "Application" section
- Choose "Clear log" if there are too many entries to obscure practical use
- Attempt the login again
- Press F5 to refresh the log
- A single entry will appear
- Click on it for details
